
| INTERMEDIATE LESSON 30 | |
| 10d.1 *Read the colour code bands on a number of different resistors and confirm their value by measurement. | Go back to the last lesson (lesson 29) to remind yourself how to read the value of a resistor from the colour code. |
| 10d.2 *Demonstrate the ability to make good soldered joints. | Remember the order for soldering a joint is:
|
| 10d.3 *Construct a simple circuit containing a battery, resistor, LED, lamp and switch. 10d.4 *Measure potential differences and currents in a simple circuit. 10d.5 *Demonstrate that a diode will only conduct in one direction in a simple DC circuit 1. Close the switch. Note what happens 2. Turn the diode round so that it is connected the other way round. Note what happens. Explain you observations 3. Measure the potential difference across these parts using a multimeter:
4. Measure the current at points:
|
The circuit should look like this: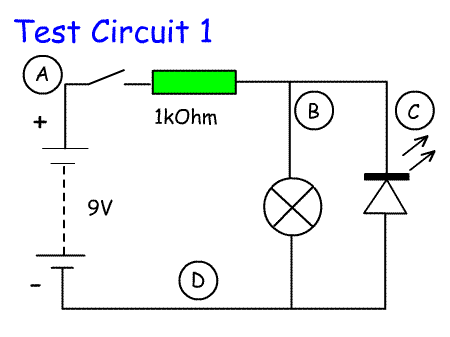 |
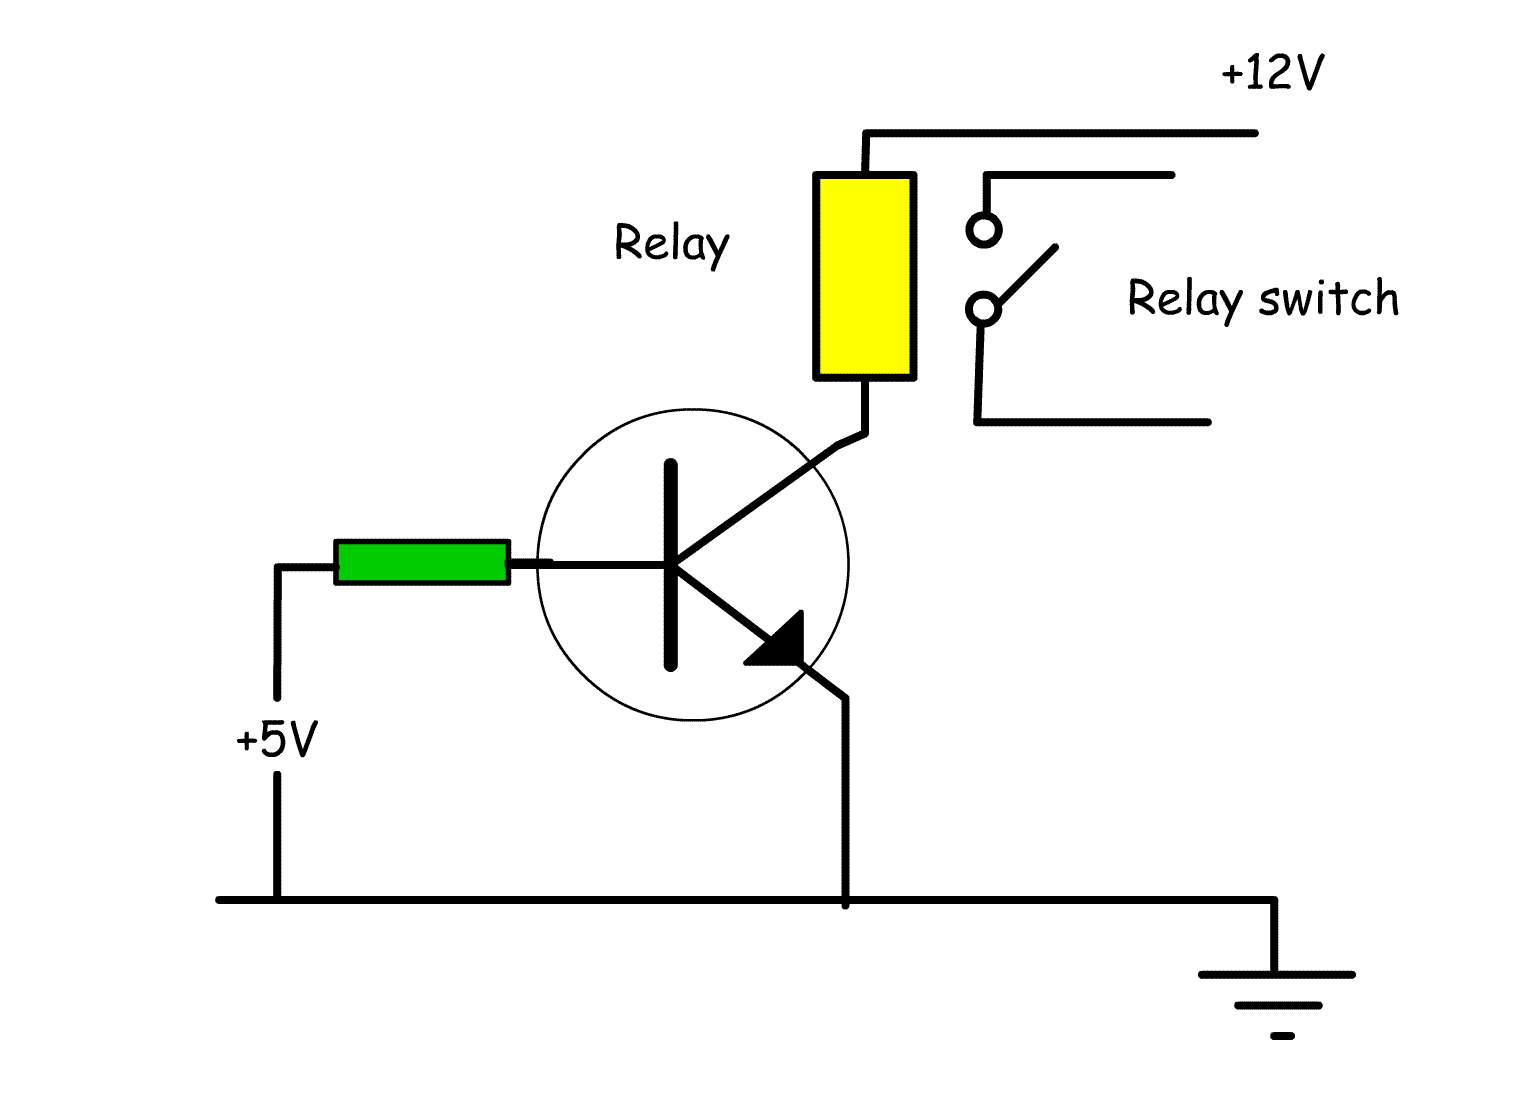
| 10d.6 *Demonstrate that a transistor can be used as a switch in a simple DC circuit. In this circuit a small current can be used to switch on something taking a larger current. Here the application of 5V to the base will cause a small current to pass from base to emitter. This will cause a larger current to flow from collector to emitter. This could be used to switch on a relay in the collector circuit. The relay switch could then be used to switch on an even higher current. A low power device could be activated with just the current flowing from the +12V line to the collector. |
 |
| 10d.7 *Fit a suitable RF connector (PL259, BNC or N-type) to a piece of coaxial cable. To fit a PL259 to coax
|
This video shows you different mothods for fitting a PL259 plug to coax: http://www.youtube.com/watch?v=8ecfu7s8rPw
|
| 10d.8 Fit a 13A plug to a piece of three-core mains cable. | See Foundation Lesson 15 for instructions on wiring a plug. |
|
Construction 10e.1 * Construct a simple amateur radio related project (e.g. direct conversion receiver, crystal calibrator, ‘grid’ dip meter, ATU and SWR meter, Morse oscillator, audio amplifier) either from a pre-prepared kit or from a published or personal design. Construction may be carried out either within a course or elsewhere, but the assessor must be satisfied that the bulk of the work is that of the candidate. |
There are a lot of simple kits on the market that will include a printed circuit board, components and often a suitable box. An alternative is to buy the components separately and mount them onto either veroboard or a plain piece of copper clad board. Try to make something that you will find useful in the shack. |