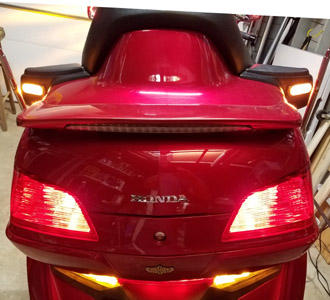
For all the things the GL1800 has going for it, there's two things it lacks. The first is enough brake light action to gain the full attention of other vehicles. The second is the need for better directional signals. I can understand why Honda went light on the brake bulbs. Each one of those 21 watt bulbs sucks some juice and gives off a good amount of heat. The very first modification for me was to swap out all of the brake and turn signals bulbs for LEDs that draw a tenth of the power. Along with that mod came the two extra pins into the center of the "combo light" which brings the total bulb count to four, two on the trunk and two below. Although quite pricey, if you toss in the high mount LED atop the trunk and ya got it made. Swapping any of the turn signal bulbs to LEDs requires the installation of a LED capable turn signal relay. That's another web page story. Simply adding these LEDs to the bike will not require a turn signal relay change. Installing Muth mirrors helps out both you and the guy behind to see the signals. This page is about going one more step in the same direction. Adding lights to the rear of the passenger speaker pods. This location gets them almost as high as the spoiler bar to get them noticed. See the end result here. |
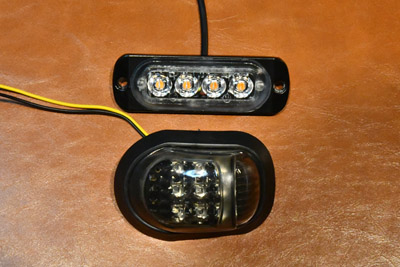 |
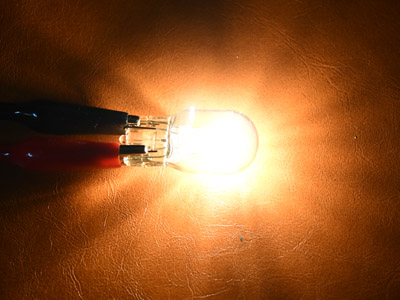
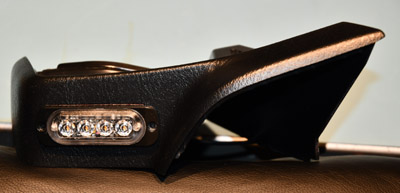
To the right is the standard 12 volt 21 watt incadenscent turn signal bulb that the GL1800 uses. It't bright, consumes 1.8 amps of current PER bulb and gives off a significant amount of heat. The very first thing for me to do on my GL was to change out all the bulbs to LEDs for an instant power savings. I wanted to add a pair of rear turn signals. Without a trunk rack to hang lamps from, there isn't much of a choice if you want to keep them as high as possible. Pictured to the left are the two candidates I found in my search. The top unit is a strobe with a list of modes and the bottom is just a cheap "smoked" multi-led lamp. My location of choice is the back of the passenger speaker pods. These both fit so it came down to a test to see which was the brighter of the two. |
 |
 |
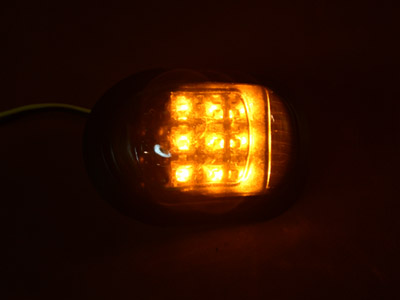 |
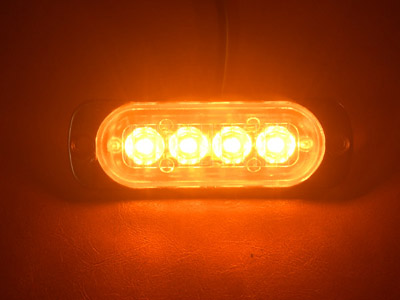
All the pictures were taken with the same manual exposure settings so a comparison could be made. While neither of these lights have the same brightness as the OEM, they don't have the size, current demand and the heat that the incandescent does. The winner for me was the strobe. Its default mode is costant on. That works for this application perfectly. It's thin, draws 0.160 amps, fits the space and is cheap. Amazon sells them for $18 per four. The catch is that they will not exactly sync with the other lamps. It's much easier to take out the rear combo lamp than take off the seat in case of issues.. Electrical connections come from a break out harness installed in the cable that feeds the rear combo light. Four nuts in the saddle bags and out it comes.. |
|
 |
 |
|
|||
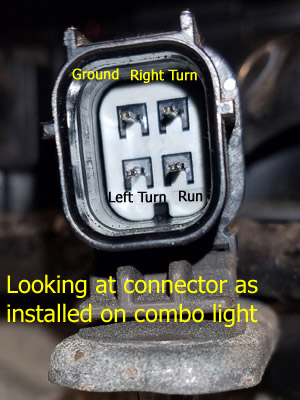
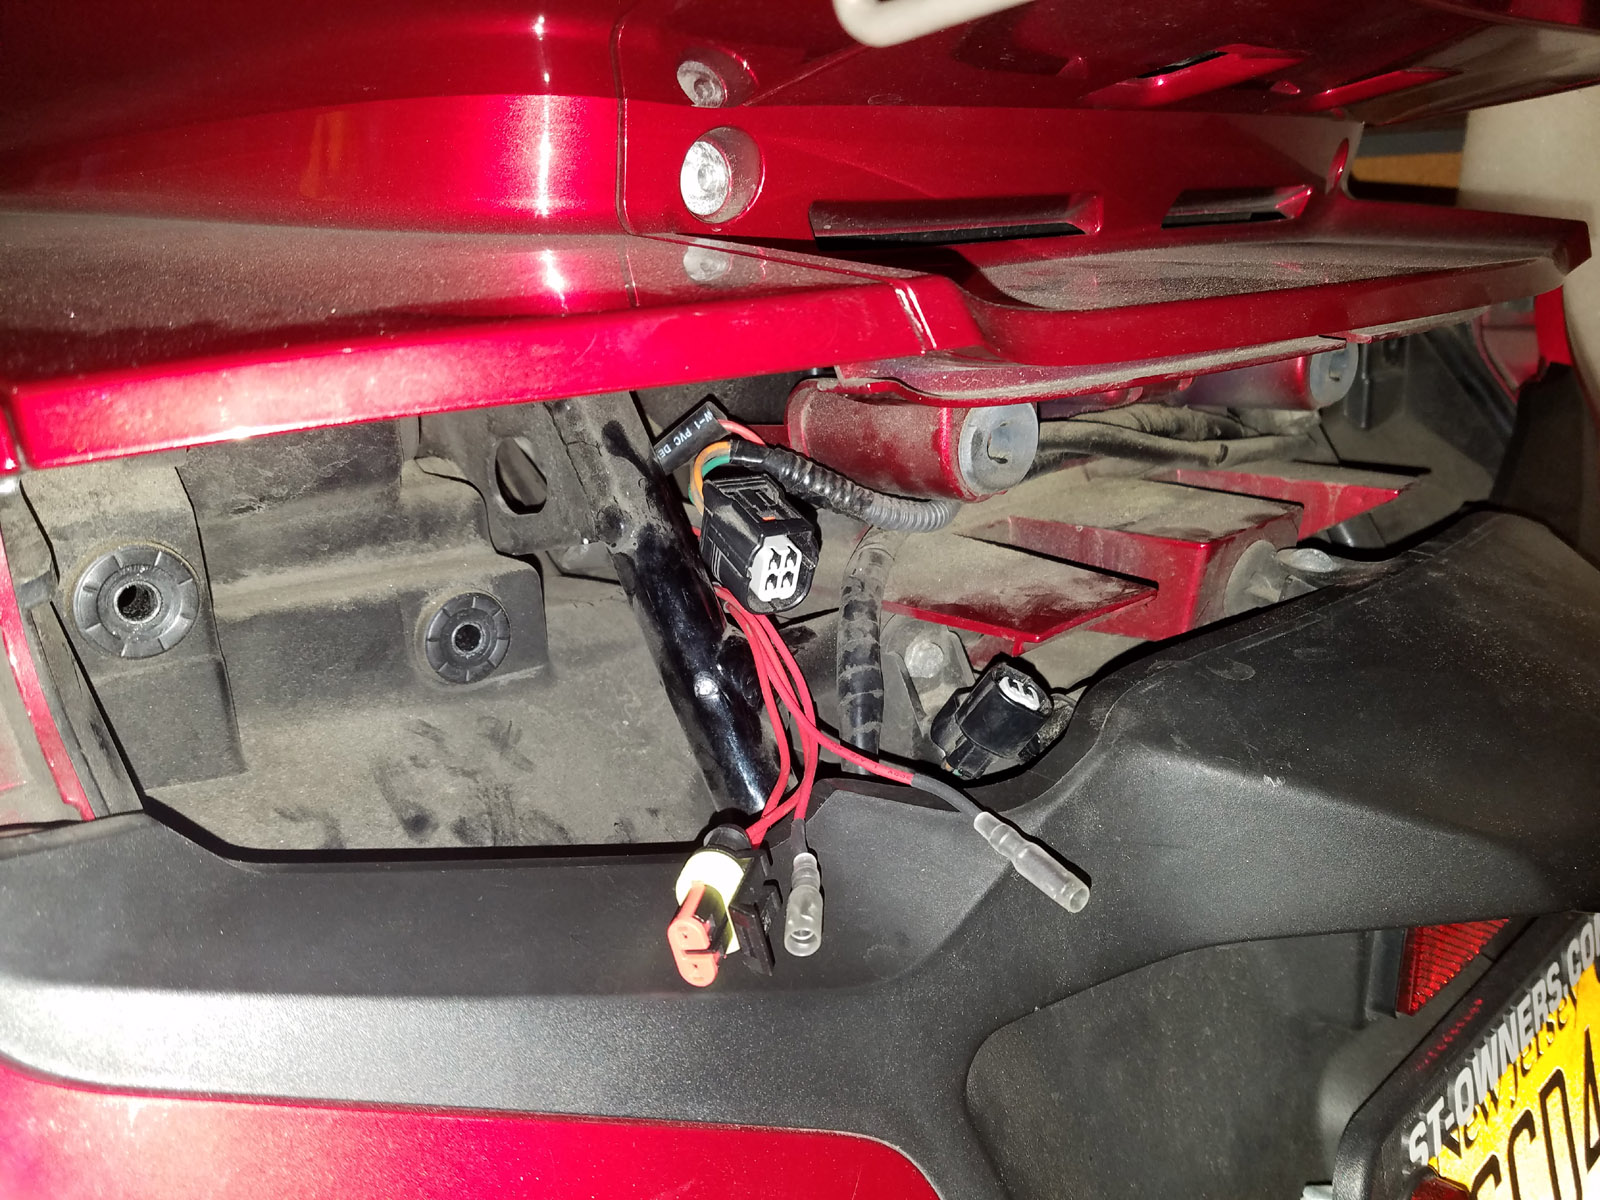
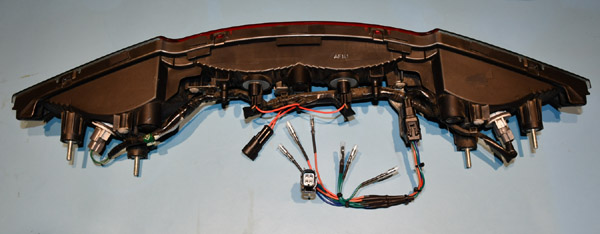
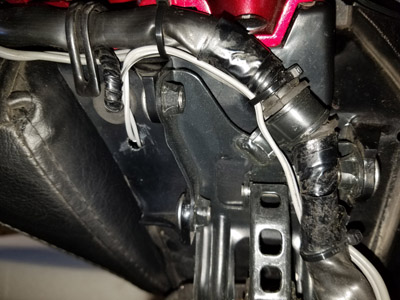
To the left is the factory center combo light 4 pin connector. Above, from right to left is the 2 pin (Sumitomo 6189-0890) then the OEM license plate connector, then two brake bullets and the two pin sealed for the Big Bike Parts brake light modification. On top is the OEM 4 pin. |
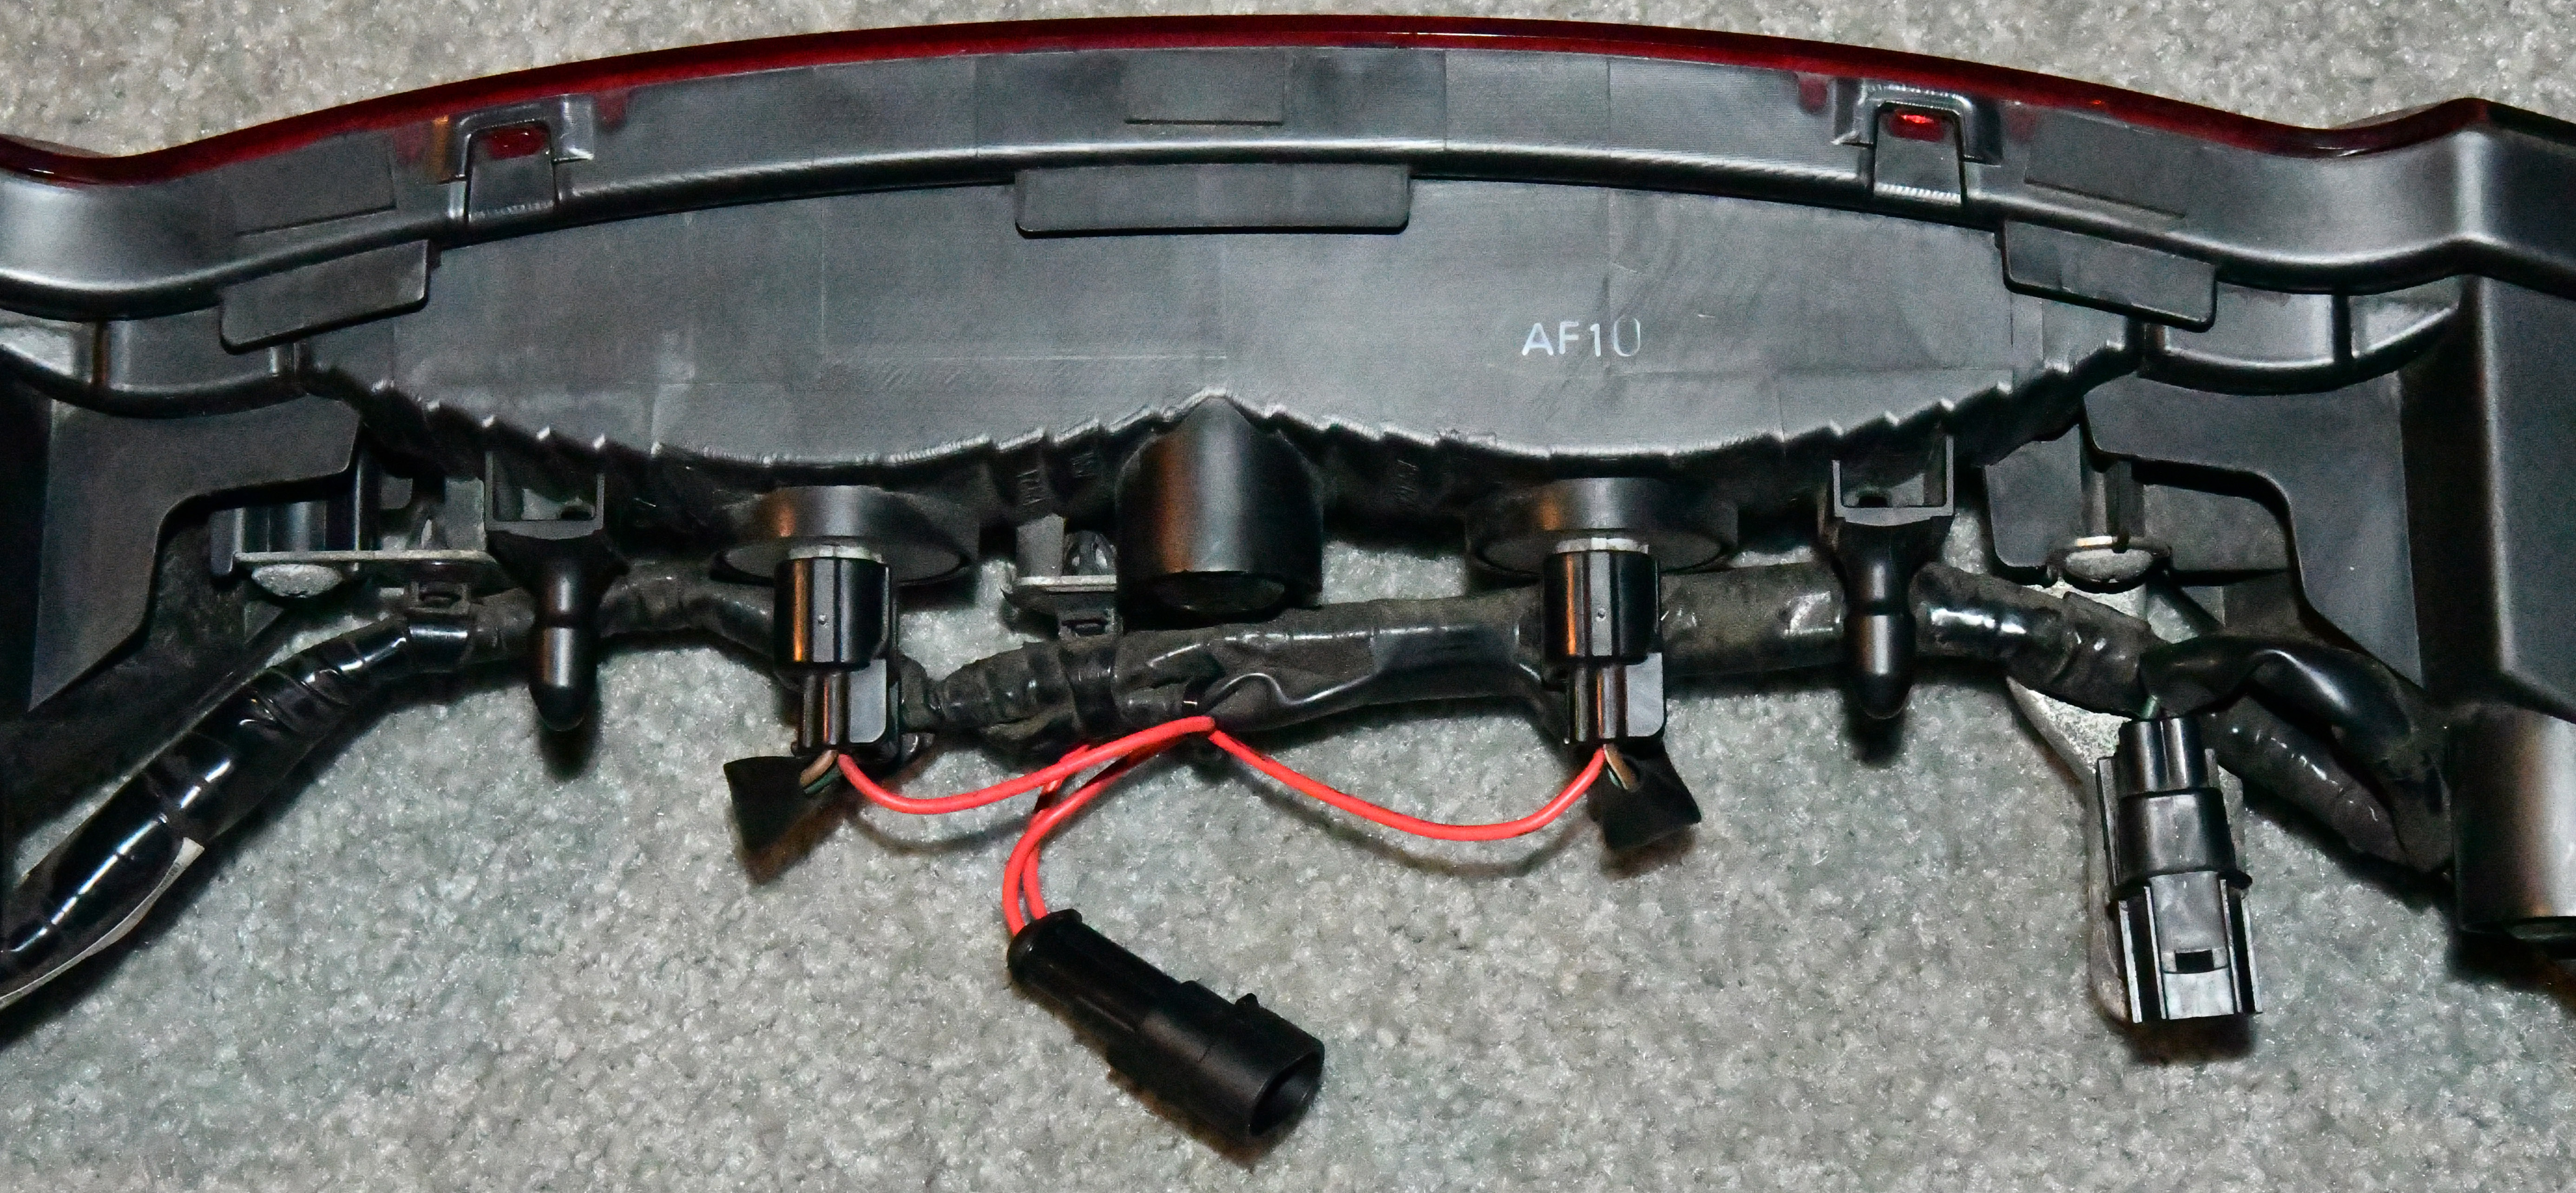
Above is the rear combo assenbly. The top photo shows the location of the 4 pin connector (to the right of center) while the lower shows the additional 2 pin sealed connector for the BigBikeParts modification. |
||||
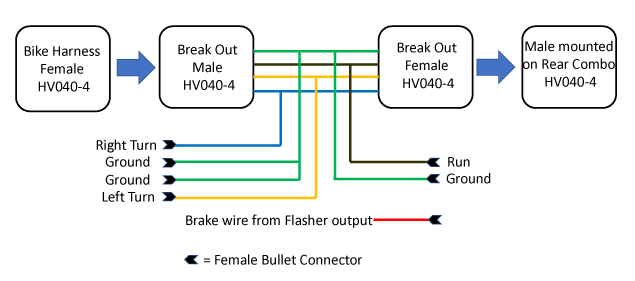
| The combo light uses a four pin Sumitomo HX series connector. It carries both turn signals, ground and running power. A sealed two pin male female connector was added to the combo brake light mod to allow the light assembly to be removed for service. 3.5mm female bullet connectors were also added to allow for additional lighting in the form of a LED reflector above the license plate. A break out cable with male and female HX connectors provide both turn signals, ground and running power. . | |||||

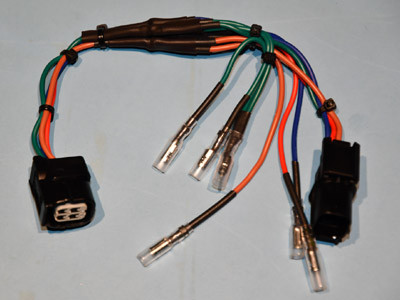 |
The Sumitomo connectors only allow one wire to be inserted into their pins. Heat shrink is used to seal the junction of the "tap" wires for powering both turn signals and the run light. Three ground connections are available. One for each turn signal and one for the "run / brake" LED reflector above the license plate. The bullet connectors are 3.5mm and were sourced from Amazon along with the crimp tool. Heat shrink is added to the bullet connectors as extra insurance against shorts.
|
 The harness and additional connectors allow for easy removal of the combo light. The harness and additional connectors allow for easy removal of the combo light. |
 |
To install the strobes requires the tops of the speaker pods to be removed. I marked the pod's center and drilled a 9mm hole. The strobes are attached with 3M VHB double sided tape. Bullet connectors are used inside the pod just in case the pods need to be removed for service. A hole was drilled in the pod base to allow the wire and bullet connectors to pass. The wire used was 20awg. It is carefully routed out and around the hinges then under the trunk for connection to the break out harness. The extra cables have to be carefully tucked in to allow the combo light to go back in place. |
 |
| There are five screws that hold the pods on. Three are visible from the outside bottom. The last two are under the inner truck deck liner. |
 |
 |
 |
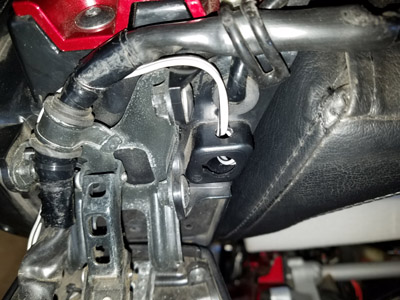
Left side under pod access hole and wire route |
Rigth side under pod access hole and wire route |