Trunk lighting for a 2012-2017 GL1800


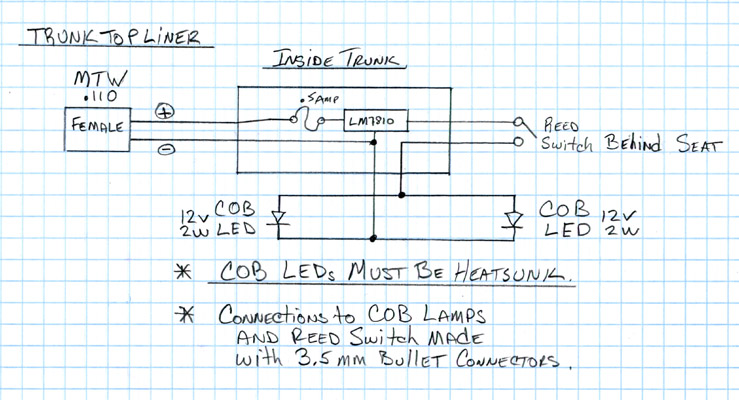
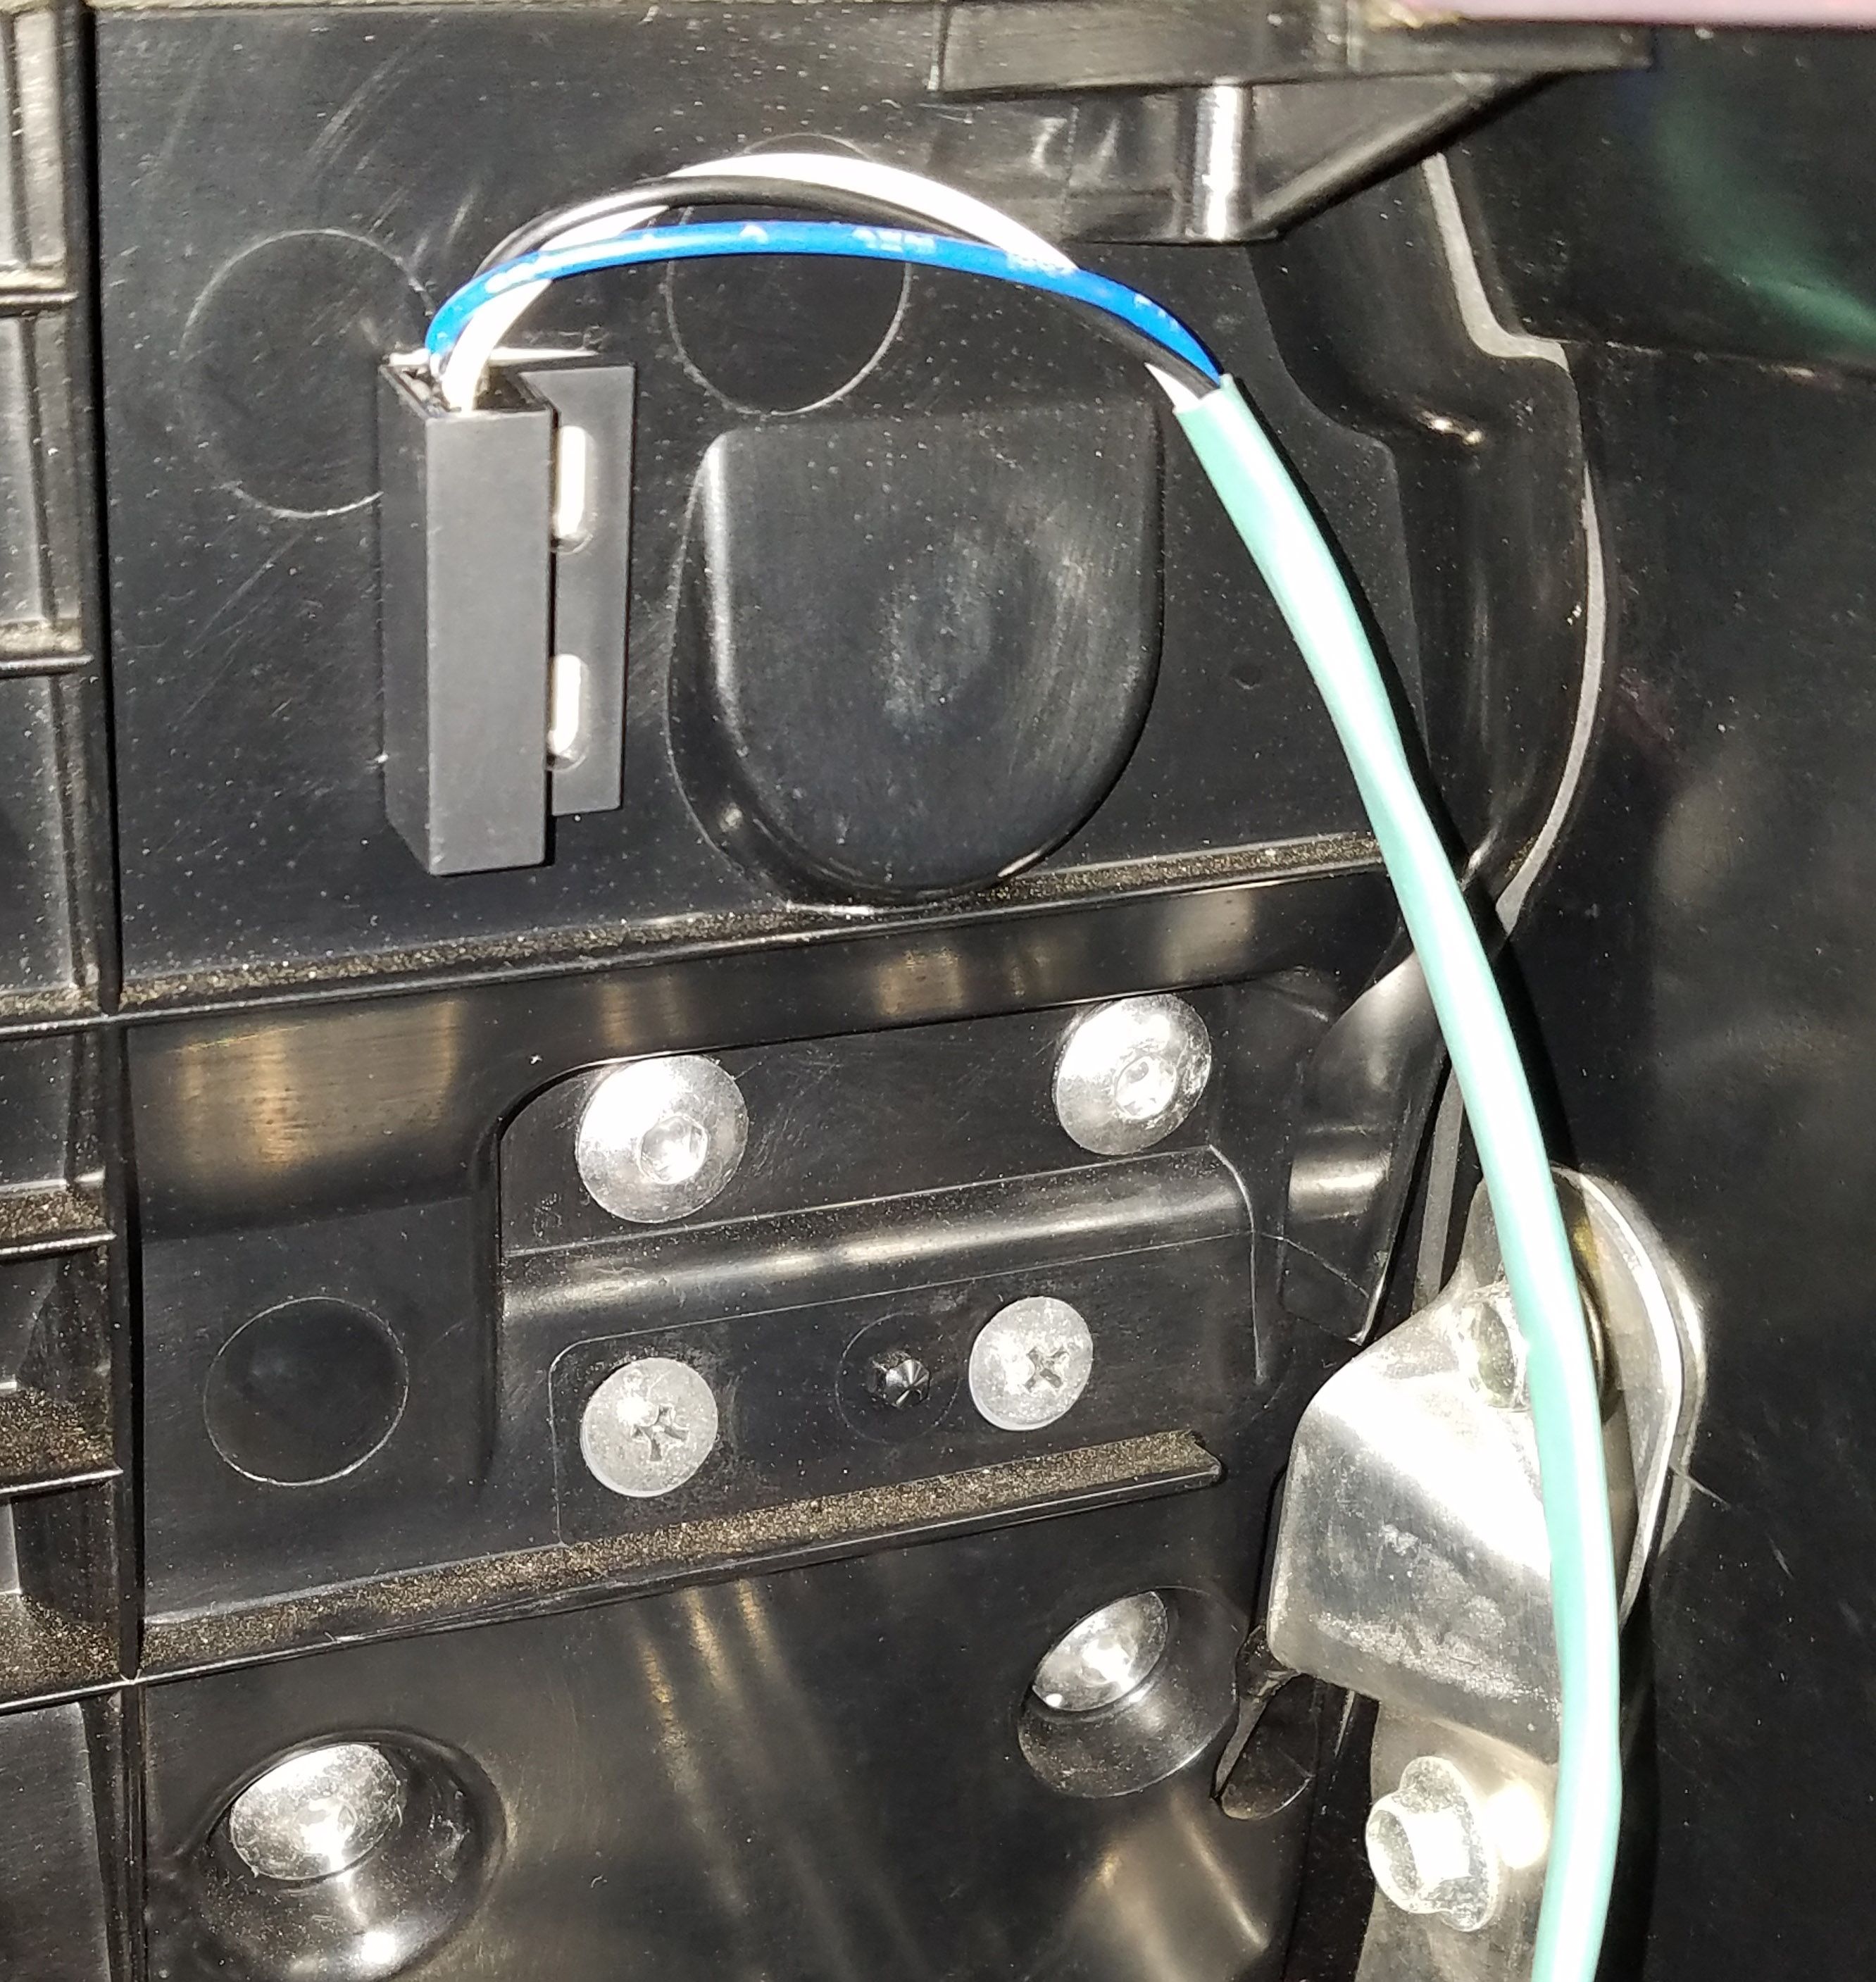
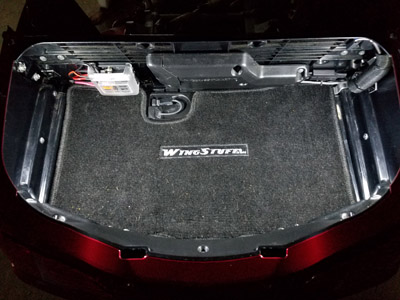
If you have ever had to open the trunk of your GL in the dark to root around for something you know why I wanted to install lights in there. I had bought the Harbor Freight head flashlight and mounted it inside the lid. That worked till I hit a good bump. The next time I opened the trunk, the light was in one corner and the batteries were all over. That was the end of that. I looked but couldn't find the OEM fixture that Honda must have made at some point. Inside the trunk lid, under the inside cover, there are a pair of two pin connectors. According to the service manual they are intended for lighting the inside of the trunk. The picture to the right is the final product. I'm not plugging WingStuff, it came with the bike.

Not including time, total cost was about $20. Thats based on a well stocked junk drawer.

In case you are wondering what the hack to mount the headlamp was, it's really simple. Cut the band off the mount. Open the trunk and look at the center of the lid closest to you. There are two screws about 2 1/2" apart. With the flashlight part detatched from the head "bracket", line the bracket up and mark where those screw holes line up in the elastic band area. You need to drill them out to allow the screw to fit through the bracket properly. Just make sure you hold the bracket correctly when you mark the locations. Do it upside down and you will be really annoyed to find that the flashlight will not slide into the mount!

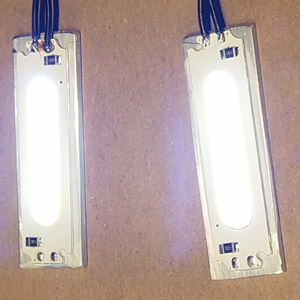
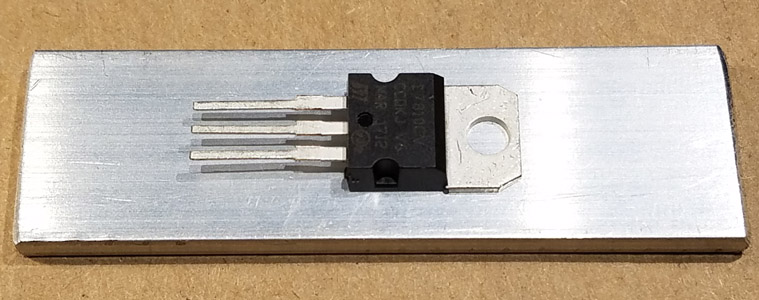
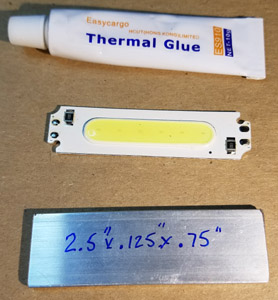
After searching the web for assembled lights and not finding what I wanted. I stumbled on the COB type strip LED. There are many Ebay vendors that sell the 60mm x 5mm 12 volt 2 watt version. I bought 5 for less than a dollar each with free shipping. The catch to these is that they NEED heatsinking. The small aluminum backing ins't enough to keep it from burning up. Temps were over 140 F !

A couple of things can be done to easily get the heat issue under control. The first is to use a heat transfer glue to attach the strip to a section of aluminum stock. Home Depot sells .75" x .125" x 36" for under $10. Cutting the stock into smaller lengths of 2.5" is easily done with a hack saw and a steady hand. Adding the aluminum gets the temp to just under 120 degrees F. Which is hot, but not melting plastic hot.

The COB lights will get mounted to the far left and right sides of the trunk as high up on the side wall as I can get them. That way, they are "invisible" standing behind the trunk.

Adding heat shrink to the ends of the heat sinks helps prevent possible shorts.

 
After adding extra metal to absorb the heat, the next trick is to lower the input voltage. Standard automotive power is approx 14 volts. I found that the LEDs would work fine at 10 volts and consume a heck of a lot less current at the same time! 14 volts yielded a current draw of 200ma per lamp. Dropping the input to just 10 volts decreased the draw to just 60ma per lamp. The light output was a little lower but still more than enough to light the trunk. The same stock aluminum that is used to back the COB light can be used as a heat sink for the LM7810. Just cut off a 3" length and add a hole to mount the LM7810 to it. The center tab is ground so it doesn't need to be insulated or isolated. Add some heat shrink around the lower half of the aluminum to keep the wires from shorting out.  
It's simple. The top leg in the picture is the input. The middle is ground and the bottom is the output. Because its just powering a LED, additional parts aren't needed.
 
.


Switching the lights on is done a buglar alarm reed switch purchased from the web for about $7. Current limit for the contacts is 500ma. Searching for "NO, NC" reed switch will result in a few choices. The "NC" indicates that when the switch is separated from the magnet, it's a closed circuit. I used a rare earth magnet to get better performance from the switch. I used a magnet came from an old laptop hardrive. Harbor Frieght sells 10 magnets for $3 for ten.. The positioning of both the switch and the magnet took a little while. The final placement allows the lights come on as the truck is opened about 2 inches. They are attached with 3M VLB tape.

Just in case something goes wrong with the regulator or the wiring, I used a 500ma pico fuse. It's integrated into the male bullet connector on the input of the regulator. Heat shrink and lots of it makes it possible. Just so I don't forget about the "hidden" fuse, I plan on flagging the wire to say that it's a fusable link.

Everything is connected together with bullet connectors just in case the trunk needs to be taken apart.

Right side reed switch location
Right Side magnet location, trunk liner removed.
 
 
K2MPW at that yaa who dot com place 01/03/2021 Rev -