Spectroscopy at Home
Go HomeFor his science fair project, my brother Joe chose to investigate spectroscopes. I helped him build them, and here are some pictures of what we made.
We tried two different kinds of spectroscopy: one based on the diffraction from a CD, and the other from the dispersion in a prism.
CD Spectroscope
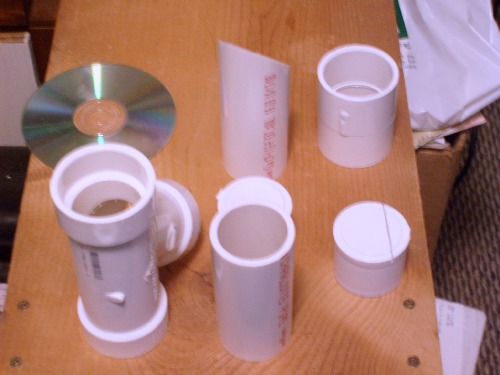
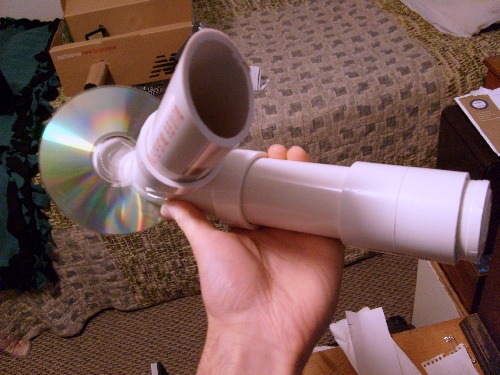
Here are the parts we used for the CD spectroscope. All parts are 1.5 inch PVC pipe. We used:- 2 plugs
- 1 Y-splitter
- 1 coupling
- A 4 inch length of pipe
- A 5 inch length of pipe, but with a 45 degree cut, for the eyepiece
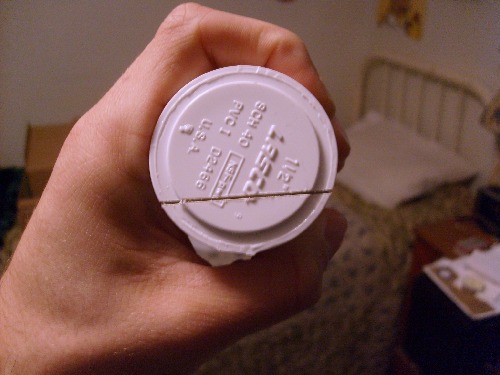
We cut a narrow slit in one PVC plug with a hacksaw, so that we had a consistent and single slit of light incident on the CD.
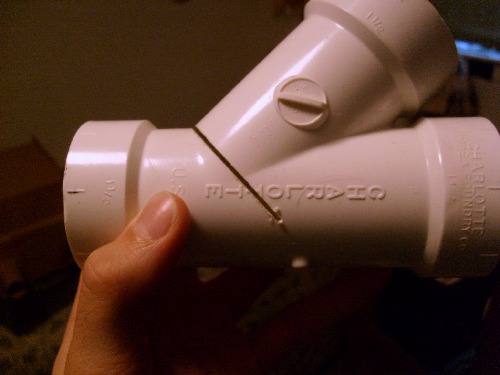
The Y-splitter should have a 45 degree cut in it for the CD to be inserted.
With this slit an old CD may be inserted for viewing. (Be aware that it will likely be scratched)
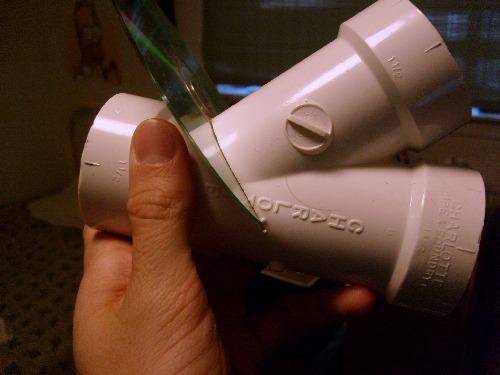
Here is the assembled product. Just point the slit at your light source, and then look down the eyepiece tube to view the spectrum reflecting from the surface of the CD. Be careful not to let the PVC hurt your eyes. It can be rough.
Prism Spectroscope
Another way to separate the component colors of a light source is to use a prism, like this one: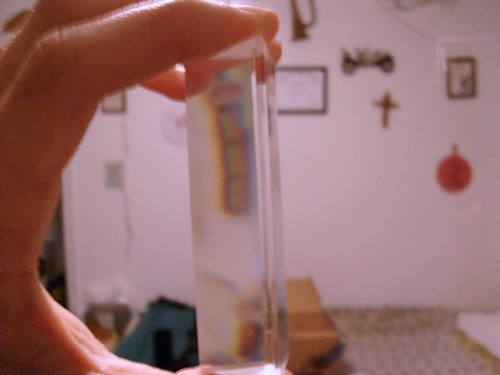
As you should be able to see, the prism is doing a nice job of refracting. The image in the prism in that picture is of a weather instrument panel on another wall, visible because of refraction. The way that colors are separated by the prism is that the prism refracts different colors slightly differently.
I take advantage of that by passing light through a slit composed of two razors, and then through the prism. This allows only a small amount of light through the prism and prevents the colors from overlapping, which otherwise would make it difficult to resolve the individual colors.
This light is then reflected off the mirror (the black object) onto a screen. I made a screen out of the plastic from an old CD. As you can see, I scuffled the CD up with some steel wool to make it less transparent, similar to ground glass. Be sure to put all these components in a dark box, like a shoebox, so that no other light interferes.
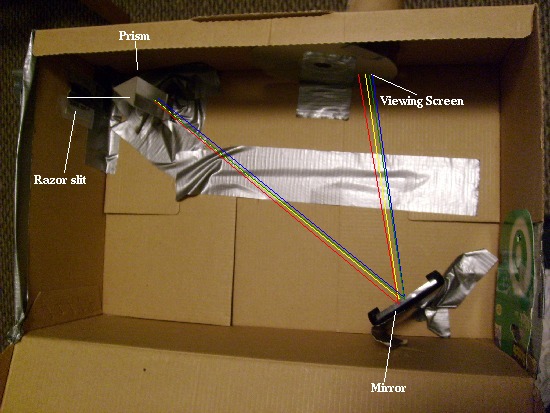
The path of the light is traced out in the image above. As can be seen, the components are crudely affixed by duct tape.
This is the surface used as a screen.
Aside: Transmission Gratings
Spectra can also be seen using transmission diffraction gratings. One can either purchase one of these, or make your own from a CD. First scratch a little bit of the aluminum coating off of a CD. Next, using Scotch tape, peel the aluminum from the plastic part of the CD. You should now be able to see through the CD, and if pointed at a source of light you can see halos of color. This is the spectrum of the light source. Here's a picture of the spectrum of a ceiling light (incandescent bulb) through a CD transmission grating.Some Spectra
This image is the spectrum of an incandescent flashlight, due to the dispersion in a prism.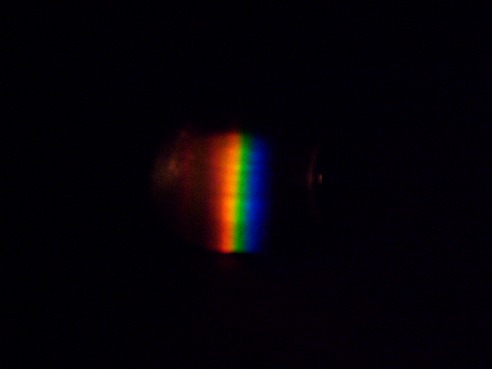
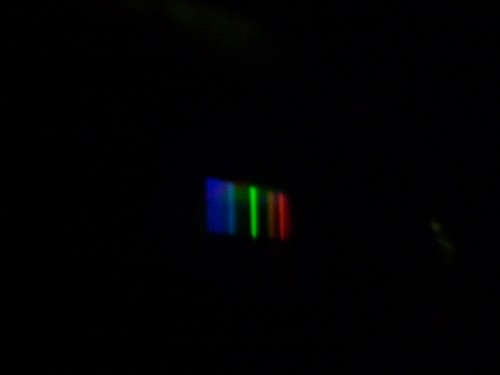
Here is the spectrum from an LCD computer monitor, viewed in our CD diffraction spectroscope. Note the component colors of Red, Green, and Blue. With these three primary colors our brains perceive the entire spectrum.
That's it for now!
Go Home
end of line.