
A ham radio digital hotspot
consists of a raspberry pi and a hat the connects to the GPIO pins
called the MMVDM "Multi Mode Digital Voice Modem" as in DMR, YSF, P-25, NXDN ect
It's connection to the Internet can be either WiFi or network cable
such as a CAT-6, powered by a raspberry pi power supply and encased in
either a custom built case 3d printed or an acrylic case made by C4Labs. You can buy the parts and build your own with a ton of choices on Amazon or eBay
There are some prefabricated hotspots out there but they usually
come at an inflated cost, there is however a small business that sells
them at a fair price CQ Radios Simo is a good guy with excellent products.
After building or buying a hotspot you'll need to configure it, if you
buy from a vendor they may set it up for prior to shipping but if not
you will have to do it, You will need a good quality mirco SD card with
at least 4GB up to 32GB is okay. You will need to download the pi-star os and write it to the SD card using Balena Etcher or other image witting software.
Once you have the image loaded onto the SD card you can also drop a WPA file with you WiFi SSID and PSK using the pi-star WiFi builder so when the device boots up for the first time it will auto connect to your home network.
Booting up the hotspot for the first time you will first need to get
pass the connecting to wireless networks, if for some reason that fails
you can connect your wireless device directly to the hotspot using the
AP "Auto Access Point" where the hotspot sends out it's own SSID
"pi-star" address bar, type either http://pi-star or
http://192.168.50.1 then configure the WiFi credentials and reboot the
device. Note: It will take awhile depending on the device you may have
to wait for it to connect.
Once you're logged into the device the first step after configuring the
wireless connection is to change the default user name and password
from pi-star / raspberry to something you'll remember, it doesn't have
to be super encrypted secret squirrel just something simple that you
can remember.
Now the fun part configuring your device.
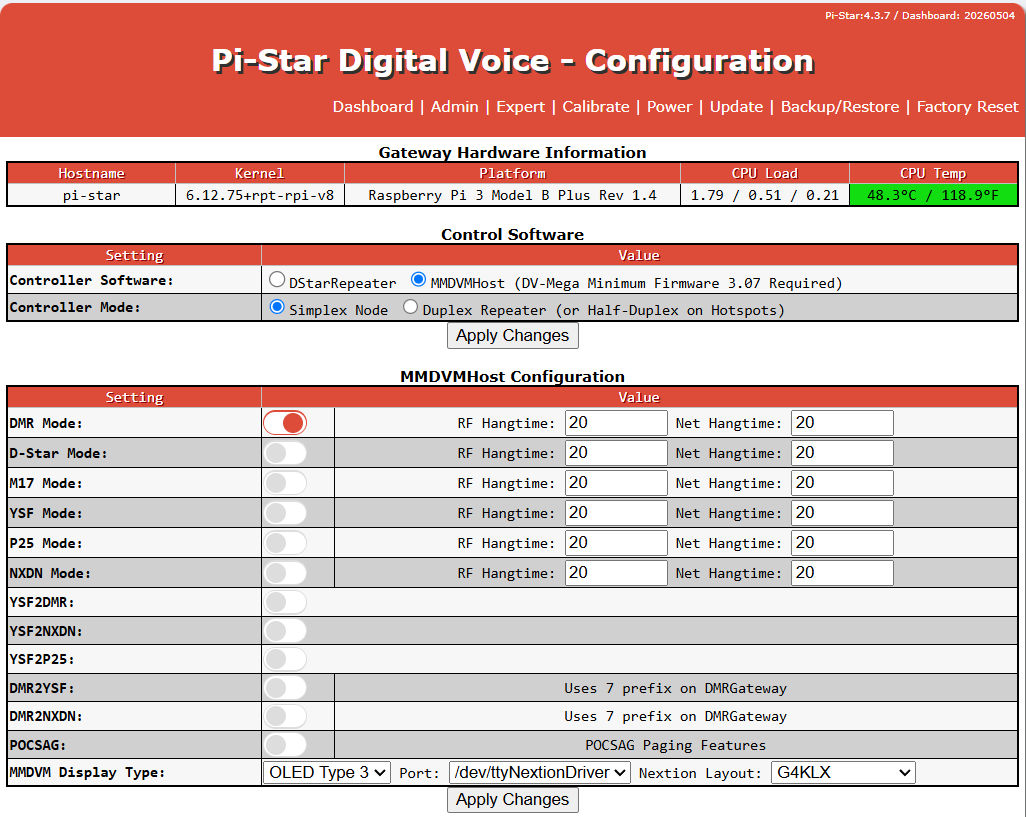
MMDVMHost Configuration
- Select the mode DMR / D-Star / P-25 ect.
- MMDVM Display Type: if LED screen is an option usually OLED 2 or 3
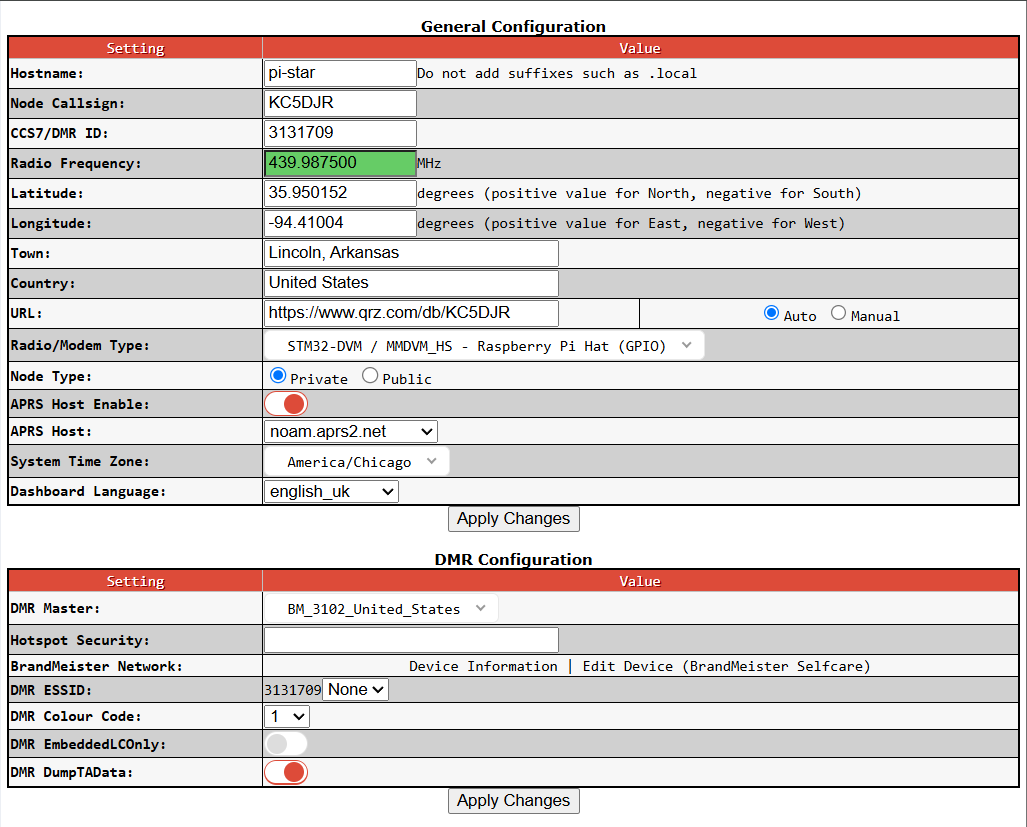
General Configuration
- Host name: default is pi-star do not use .local in the name if you want to change I recommend leaving this alone
- Node Call sign: Your call or it will not work
- CCS7/DMR ID: your DMR user ID you got from Radio,net
- Radio Frequency: (438.800) is default and usually ok (434.000 or 439.000) are both good choice avoid 446.550 it's over populated
- Latitude: & Longitude: to show your location
- Your DMR network access password called a "Hot Spot Password" set with your DMR network account like BrandNiester or TGIF ect.
- Your preferred hotspot
frequencies (438.800) is default and usually ok (434.000 or 439.000)
are both good choice for duplex or simplex avoid 446.550 it's over
populated
- URL: usually your QRZ page use this https://www.qrz.com/db/your call
- Radio/Modem Type: usually "STM32-DVM MMDVM_HS -Raspberry Pi Hat (GPIO)
- Node Type: either public
or private if you want to share access to your hotspot you would select
public but the need to add the DMR user ID's that have access after
selecting public a new box underneath will allow you to add multiple
users
- APRS Host Enable: Your device will send out APRS data for your hotspot it will appear on APRS.fi maps
- APRS Host: if you live in North America use noam.aprs2.net
- System Time Zone: set to your time zone so the dashboard shows the logs in your time
- Dashboard Language: defaults to UK English and that's fine
DMR Configuration
- DMR Master: You have some
options you can select a BrandMeister server close to you or you could
select "DMR Gateway" which will allow you to add additional network
like TGIF set using the expert advance configuration settings more about that later
- Hotspot Security: your DMR network access password aka hotspot password
- DMR ESSID: Your CCS7/DMR ID: your DMR user ID you got from Radio,net
- DMR Color Code: Pick a color code for your device
- DMR EmbeddedLCOnly: Leave off unless you run into performance issues
- DMR DumpTAData: Turn on to send GPR / APRS data
Mobile GPS Configuration
- MobileGPS Enable: Turn on to support APRS data from the device not your radio
- GPS Port Speed: Default 48000 is fine
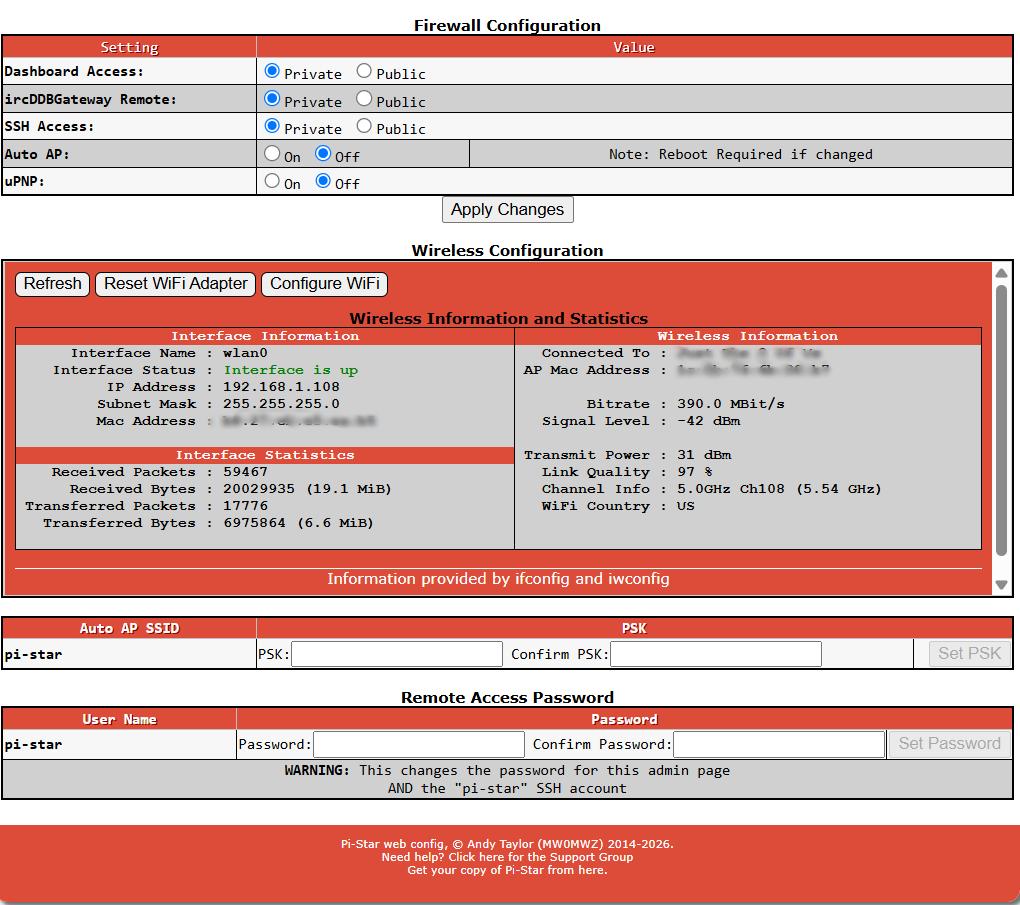
Wireless Configuration
- Here you can refresh / reset / configure your wireless setting including do a scan to search for your home network SSDI
- Auto AP SSID: do not mess with this
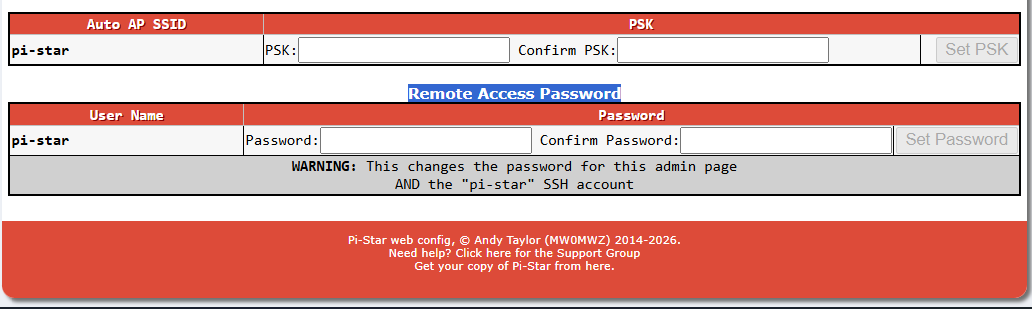
- Remote Access Password:
here you need to change from the default login pi-star password from
raspberry to something new this is a new requirement from pi-star and
DMR
Note:
after you have successfully connect the device to your home network
turn off auto ap as it ois an unsecured access point people can use to
infiltrate your network
Screen shots
As a side hustle I configure MMDVM pi-star hotspot as well for usually around $50, I can
make you a complete plug and play without the expensive chargers
that
you will pay Bridgecom $80 per hour or others.
What's included?
The following applies to DMR radios made for ham use and MMDVM pi-star devices only
• Personal one on one instruction
• Get you registered
with RadioID.net to obtain your DMR user ID, or get the old
one validated so you can use BrandMeister
• Multiple DMR network registration / validation and password setup
• Adding the BrandMeister talkgroup manager to your pi-star dashboard
• Program your DMR radio with my custom code
plugs, debloating your current plug, removing unnecessary talkgroups
and zones, renaming talkgroups, clean up
• I have custom talkgroups list that include 6
& 7 digital talkgroups that are not listed or labeled by
BrandMeister or anywhere else
• pi-star hotspot configuration, adding
additional DMR networks using DMR Gateway for TGIF, AmComm,
QuadNet, FreeStar, System-X, XLX, BrandMeister, etc
• Helping you with basic computer skills required for DMR code plugs and CPS software operation
• Tech support via email, messenger, telephone,
SMS text, remote PC, on the air using my AllStar node, Echolink node,
my BrandMeister DMR talkgroup
• Personal how to videos custom made for you and your setup
• Tech Support should you run into any issues with the work I have done for you
Basically what I do is get you on
the air with a working hotspot configuration and code plug for your
radio, I have many happy individuals who are now on the air and
enjoying DMR

