|
Home
Up
| |
05/18/2011
I have been in the process of building a communications box to allow portable
long range an local communications. This is not my Idea, and has been done many
times before but my design draws from previous design and enhances upon it to
suit my needs.
I wanted a box that was self contained, where I could switch from battery power
source, A/C power in a matter of seconds, could be deployed quickly, and be semi
water proof. I wanted provisions to be able to charge the batteries if
electricity is up and also use solar power to charge it. I also wanted to have a
way to monitor battery/ Power supply voltage and have a port for charging
accessories, portable radio's.
I used a box that others have been using, it is made by MTM and called the
SPUD-7. It has ample room and reasonable priced and fits the bill nice. Many
others have mounted the radio and accessories to the box, and used rubber
washers to maintain water resistance. I decided that I would rather have a rack
that can be deployed out of the box at base camp, and allow for more air flow if
needed.
I wanted to be able to use this at home, in the field, throw into the back seat
of the car and operate mobile if need be. Since the face of the radio comes off,
I already have a mount and cable run. I can throw it into the back seat, pull
the face off, and clip it into the mount, and operate the radio while mobile.

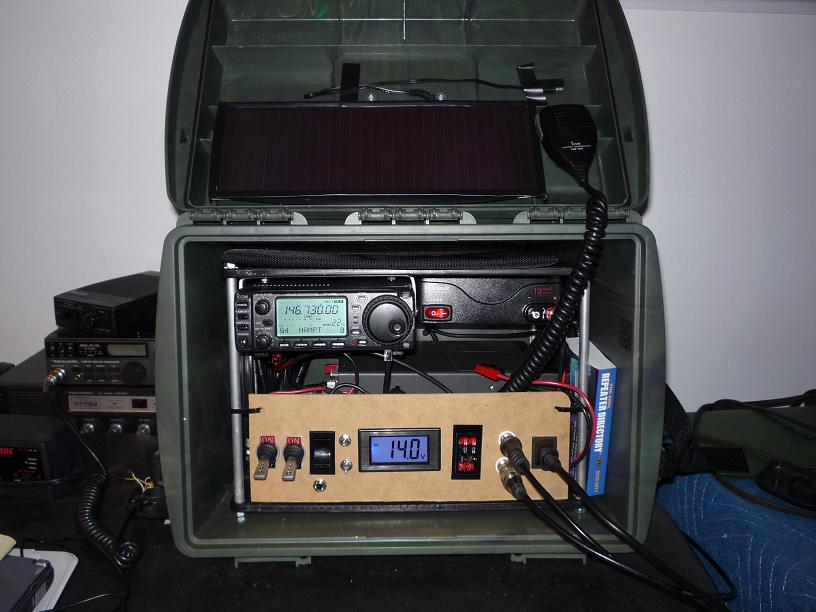
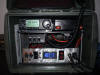
Here is the box as it sits today, far from done but getting close.

I am using a clipboard that I cut up for a temporary switch
panel, I am still waiting on the digital multi meter to come in, once I get
a measurement I can order the custom panel that i have designed. Right now
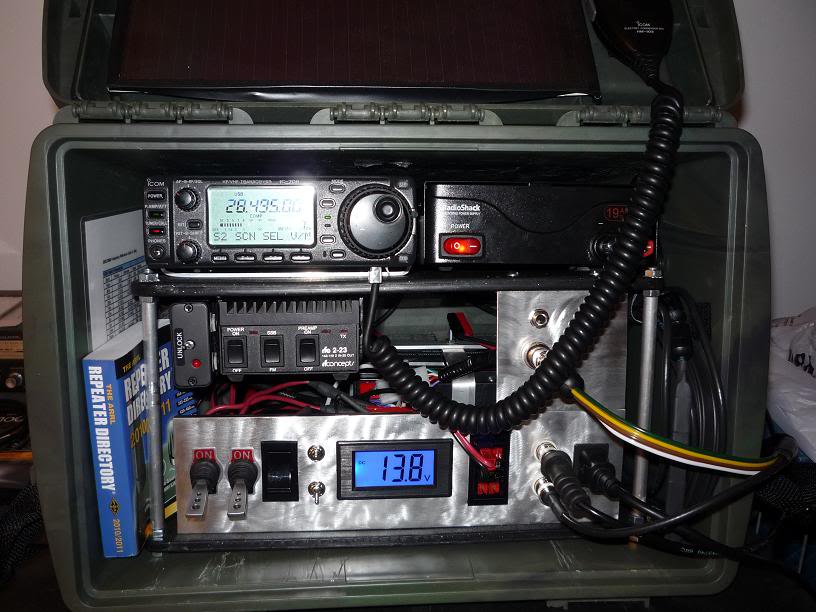
the contents of the box are as follows.
Icom 706 HF/VHF radio
Radio Shack 19 Amp DC power Supply
Icom AT-150 Fully Automatic Antenna Tuner

Solar Panel
I had originally wanted to put one 18 Amp hour gel cell battery in the box
and a battery charger, but the antenna tuner is a little too large. So I
opted to put both of my batteries in another box with the battery charger.
The plans are to upgrade to a much smaller and more efficient tuner, but
this one I already have and it works fine.
It is a work in progress and should be well refined when done, the list of
things I have to do yet,
Add voltmeter
Add Panel
Smaller Tuner
Add Battery and Charger
I will also be building a thin wire antenna that will be 100 feet long, and
be built on 2 reels the size of a yo-yo, it will have a matching transformer
that fits into an Altoids can and can be deployed in multiple configurations
and work all bands from 80 meter to 6 meter.
I also hope to add these.
TNC for running digital modes with computer
CW Key and learn more Morse Code.
05/9/2011

Got the meter yesterday from China, picked it up and cut the hole for it. Got
to test the box portable, and mobile and all worked as planned. The transition
of sitting on the desk to being deployed in the vehicle was very fast and
organized.
Now that I have the measurements of the meter I am going to order the panel so I
can call "The Box" complete and move on to the other parts of this project.
07/14/2011
I posted pictures of my box build previously, far from done at the time but
it was functional. Due to the size of the tuner I had I decided to omit the
battery and put those in a separate box for the time being. I used a rack for my
box giving me the ability to pull the rack out for air flow, and ease of
service. I sold the Icom tuner and picked up an SGC
239. Freeing up the room to add the battery, and then I started to think
how I could do things better...........
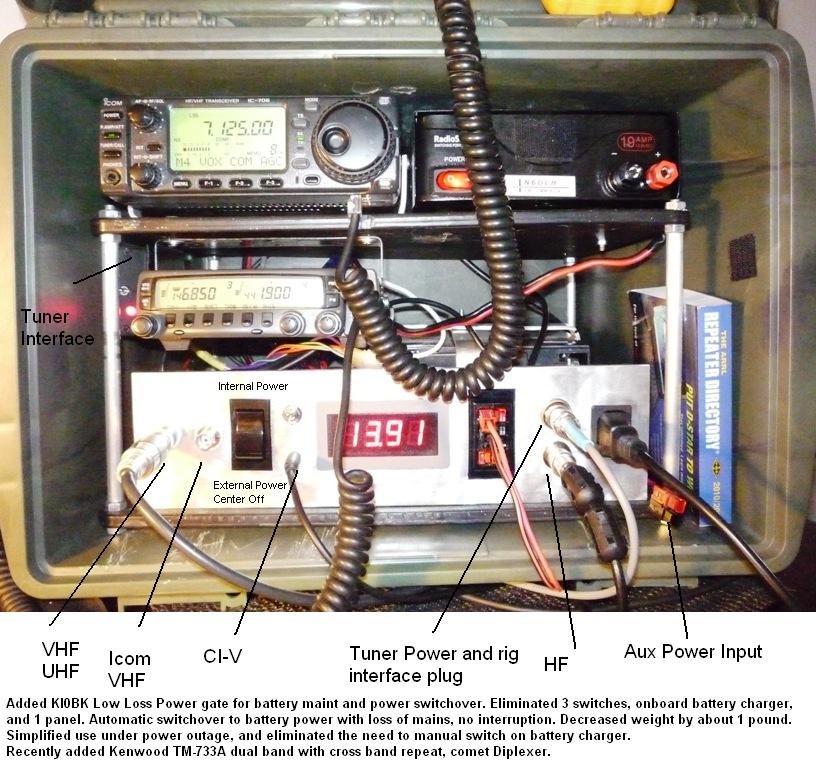
So I decided to lower the rack and mount the radio on the top, doing this
would free up space on the sides to better mount the radio and power supply in a
more uniform fashion. It also allowed me to mount additional items under the
rack, and if I remove the rack from the box the speaker is no longer blocked.
I added my 17ah SLA battery where the tuner once was. Since I am running the
Icom 706, the max power on 2 meter is 10 watts. Lowering the rack allowed me to
mount one of my 2 meter amplifiers under the radio. It is an RF Concepts 2-30
amp, rated for 2 watts in 30 out. This amplifier produces about 50 watts on the
power supply and around 40 on battery power.
I was going to order a custom machined switch panel for the box since I was
unable to find aluminum plates that fit my specifications. Today I met up with
Juan at his shop. He was able to find me a piece of aluminum that was 1/16 of an
inch thick, and was formed at a 90 degree angle. The large size is 3 1/4 in, the
short size about 1 inch, powder coated tan, Perfect for the switch panel! So I
spent the last couple of hours cutting, drilling and filing. I am using the
cigarette lighter adapter for the amplifier at the moment, I ran out of power
poles fittings to tie the amplifier into the radio power wire.
I am still not done, I should receive my Icom to SGC interface tomorrow and
will mount it up. The interface will allow the SGC tuner to be controlled and
powered through the factory Icom AH-4, but much more range at a better price. I
need to get a battery tender trickle charger and mount in it, and build a mount
for the battery. I am going to make a small panel to mount under the power
supply, it will have a 4 prong mic connector that will be used for the tuner
control and power line, and a panel mount jack for a strait key.
The small reciprocating saw I used to cut the holes in the panel tore the powder
coating up really bad. I decided to take the paint off with a whiz wheel a and
debate if I was going to paint it. It created a swirl look on the aluminum and
gave it sort of an industrial look, I decided I would leave it like that.
07/15/2011
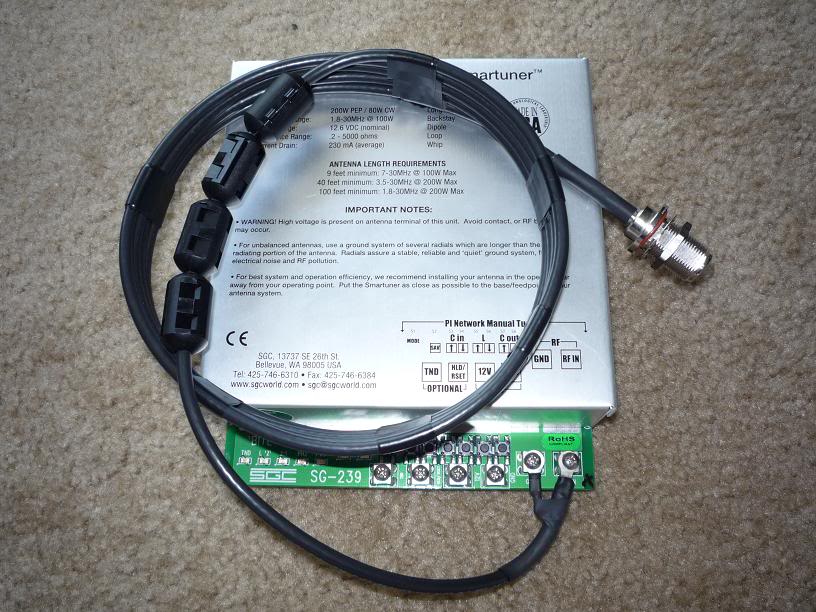
SGC Antenna Tuner arrived today, Here is my portable antenna.
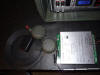
Ihave the line reels wound with 51 feet each of 22 gauge wire, i also have 28
feet of 300 ohm twinlead. That gives me a 102 feet antenna that will fit into a
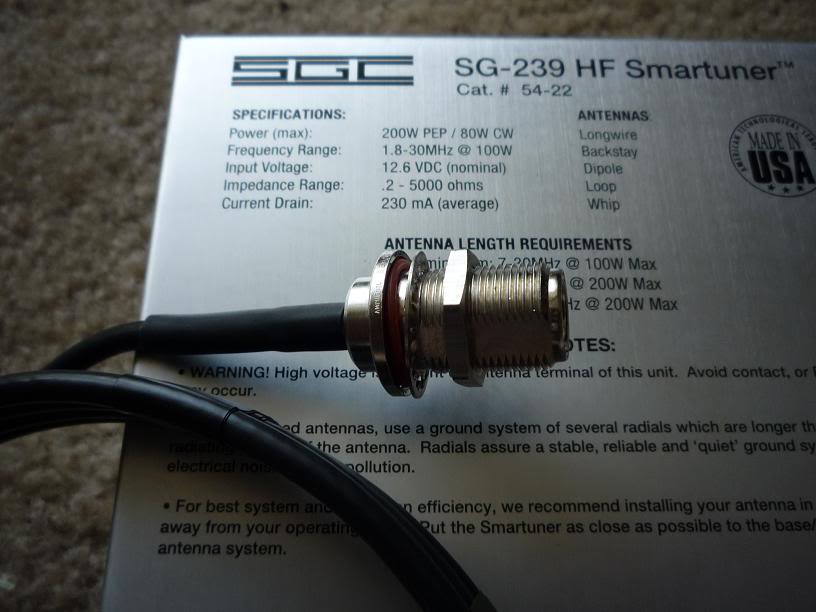
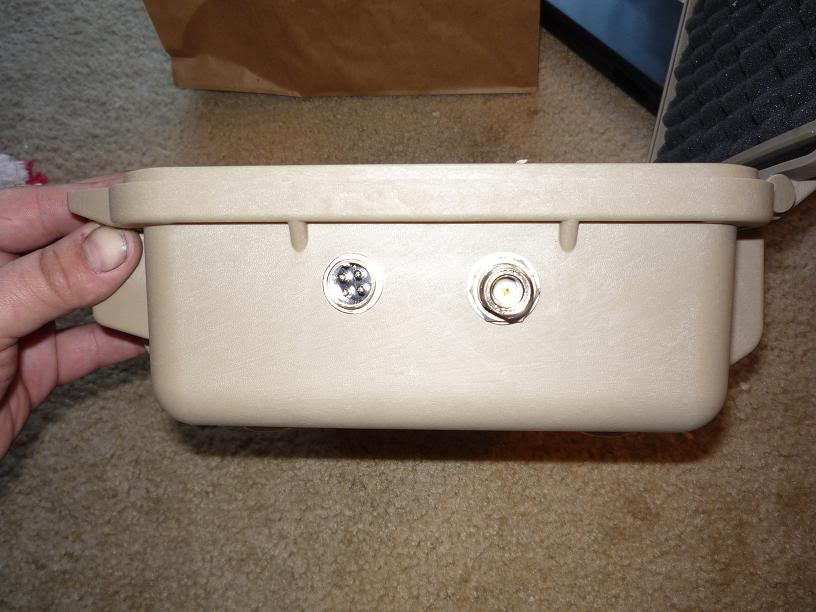
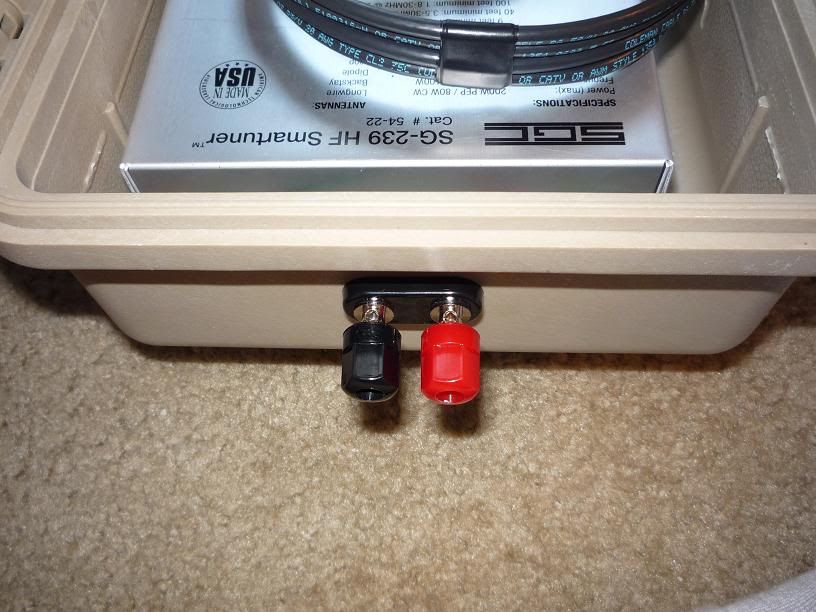
cargo pocket on a set of pants! I have a Pelican 1200 case on the way to mount
the SGC 239 in. I will use an N connector bulkhead for the Input and a 4 Prong
Mic connector for the control and power wire for the tuner. The output will be
Binding post/Banana plugs, this will allow me to feed the antenna in a doublet
configuration, making a portable G5RV, or I can plug the reels into the pelican
case to run any number of antenna configurations using a random wire and
counterpoise. Of course they will be water proofed and test for integrity.
The pelican 1200 should have enough room to store the portable antenna when not
in use. I will post updated pictures when I get the SGC box mounted and wired
up.
I also used my additional 17 AH batter to make a Auxiliary power station/Jump
Box from a plastic ammo can and a bunch of stuff in my parts junk drawer. I am
waiting on the Powerpoles to get here and I will post pictures of that as well.
It will serve as a multi purpose power station and will have some very neat
accessories to power many things.
I am also going to add one additional solar panel for about 3 watts output, or
around 250ma of charging current.
I will post updates as I complete them.
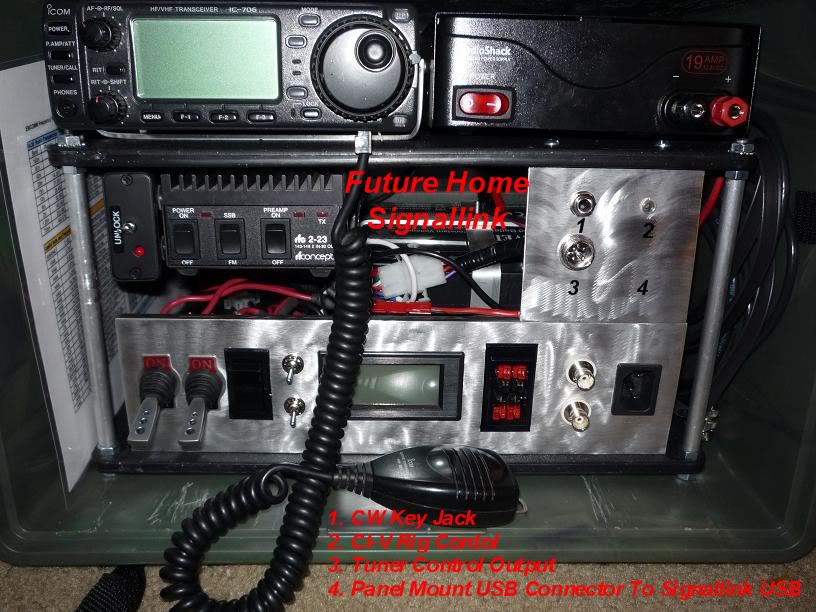
Today I got the second panel mounted, I had to take the cig lighter adapter out
to make room, but that is ok I have a different one that I will put some power
poles on. I cut the panel shorter to make room for the Signallink USB that will
be coming in another week. I added some of adapters I had laying around that
will allow me to connect a CW Key, a CI-V cable for rig control and I will have
a USB "B" panel mount coming in to connect into the signal link. It will allow
all the connection connected through the panel.
I mounted the tuner controller to the side of the amplifier using Velcro, I will
need to come up with a different mounting solution, once it gets hot the
adhesive is likely to come off. I was going to mount it to the right of
amplifier, but needed to make room for the signal link. According to the specs I
should have enough room, I have exactly 3.75" between the amplifier and the
right side upper panel.
I also cut the aluminum tuber down to fit over the all-thread that I am using
for rack standoffs, I originally used the tubing but did not get around to
cutting it down and installing it. I was also able to make a hold down for the
battery out of 1" aluminum straps bent to fit over the battery and held down
with bolts through the bottom rack.
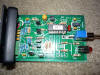
07/17/2011
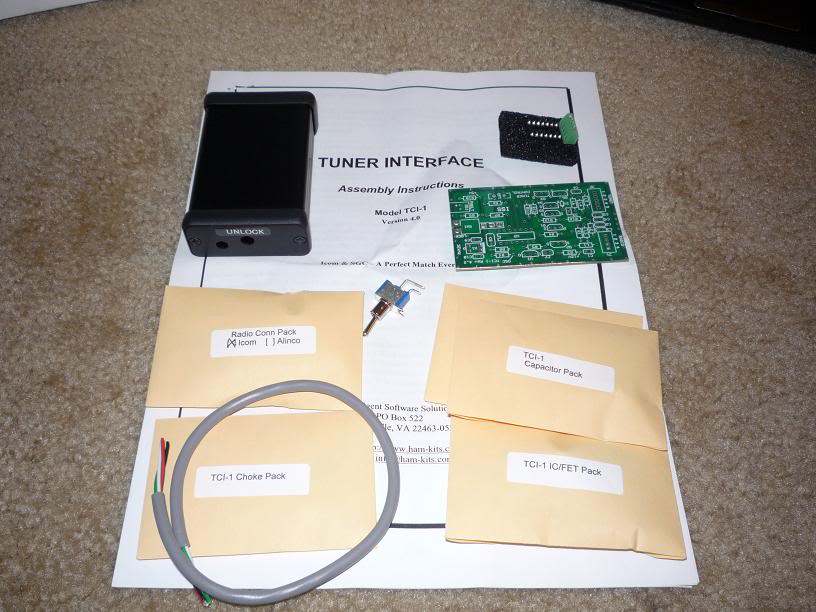
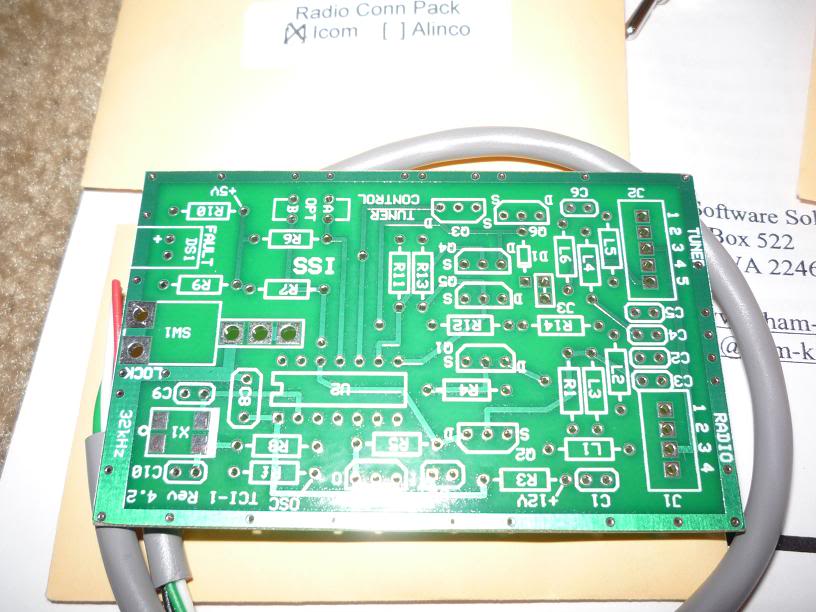
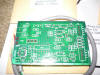
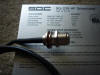
Received the tuner control interface yesterday. Thanks to one of the AR15.com
Hams that told me about the Icom/SGC tuner interface controllers from
http://www.ham-kits.com/mainframe.htm. The interface allows the Icom radio
to control the SGC tuner through the radio just like the Icom AH3/AH4 tuner. It
powers the tuner and interface from the radio, and also has a hold switch that
allows you to lock the current tune in, that way a changing antenna environment
with varying SWR will not go into tune mode
in the middle of the QSO.
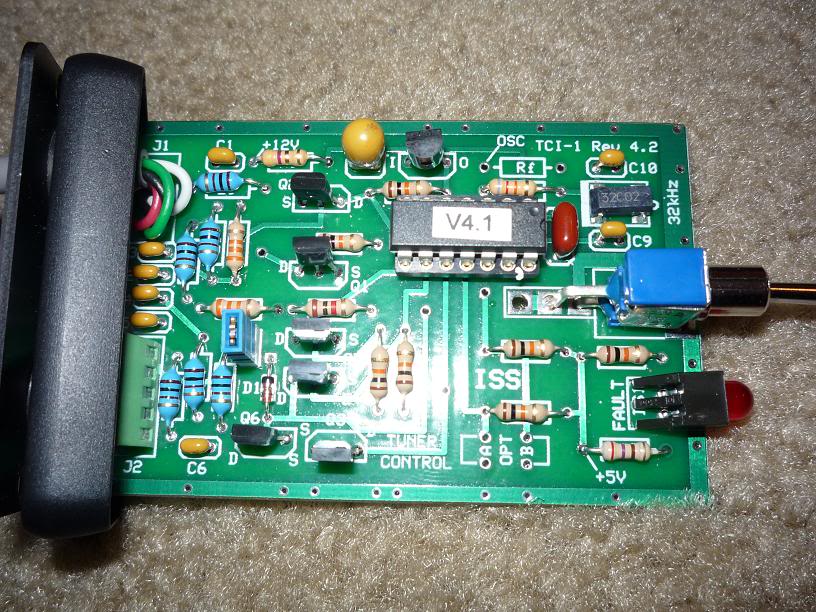
It also has a Fault LED telling you if the tuner was unable to tune, or if it is
in bypass mode. It is a very nice kit, and this is what it looks like fresh out
of the package.
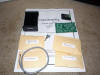
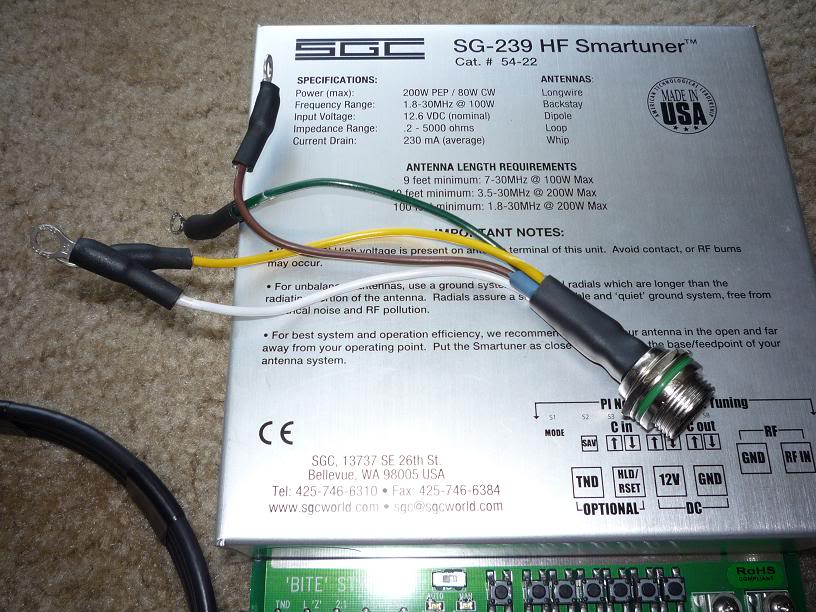
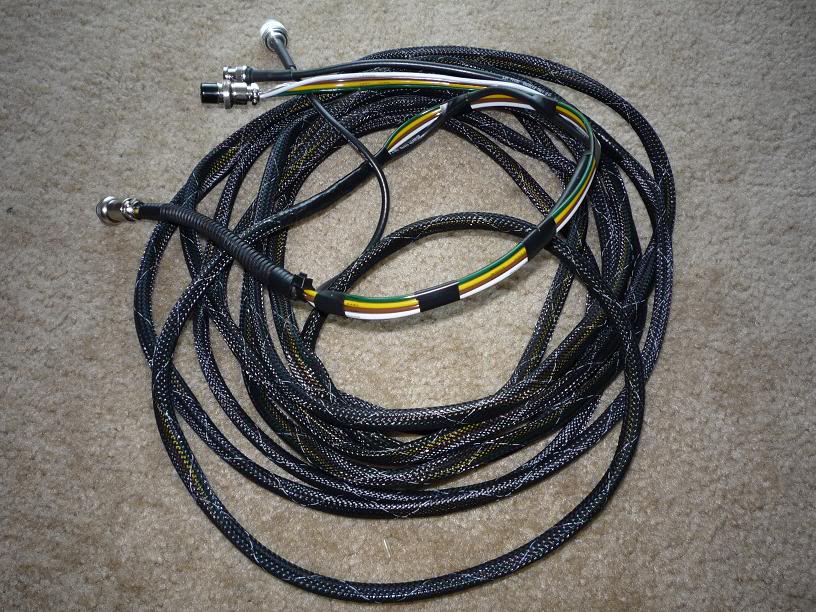
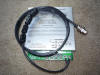
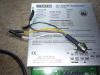
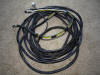
I cut another plate for the box, this will have the microphone
connector that will lock into the box just above the BNC connectors. The cable I
used to run to the tuner box is 4 wire ribbon cable that is used for trailer
wiring. I will be using a 25 foot run of it, heat shrink to the RG-58 coax
cable. It will run to the Pelican 1200 case containing the SGC tuner. I plan on
using some braided wire sleeve in OD green to cover the coax and ribbon cable.
Here is the Panel and the wiring I will be using.
I hooked the ribbon cable directly the the tuner and tested it out tonight,
the interface works great! One push of the tuner button on the radio it switches
to CW mode and sends a tone, the tuner relays lock in the correct setting and
switches back to the SSB mode. The Icom radio also has a setting that will
enables the tuning the first time the PTT button is pressed when you switch
bands or change frequency more than 1%.
I will update when the tuner box shows up and the panel is mounted in.
07/20/2011
Today I got the second panel mounted, I had to take the cig lighter adapter
out to make room, but that is ok I have a different one that I will put some
power poles on. I cut the panel shorter to make room for the
Signallink USB that will be coming in
another week. I added some of adapters I had laying around that will allow me to
connect a CW Key, a
CI-V cable for rig control and I will have a
USB "B" panel mount coming in to connect into the signal link. It will allow all
the connection connected through the panel.
I mounted the tuner controller to the side of the amplifier using Velcro, I will
need to come up with a different mounting solution, once it gets hot the
adhesive is likely to come off. I was going to mount it to the right of
amplifier, but needed to make room for the signal link. According to the specs I
should have enough room, I have exactly 3.75" between the amplifier and the
right side upper panel.
I also cut the aluminum tuber down to fit over the all-thread that I am using
for rack standoffs, I originally used the tubing but did not get around to
cutting it down and installing it. I was also able to make a hold down for the
battery out of 1" aluminum straps bent to fit over the battery and held down
with bolts through the bottom rack.

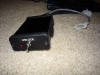
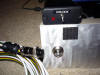
07/21/2011
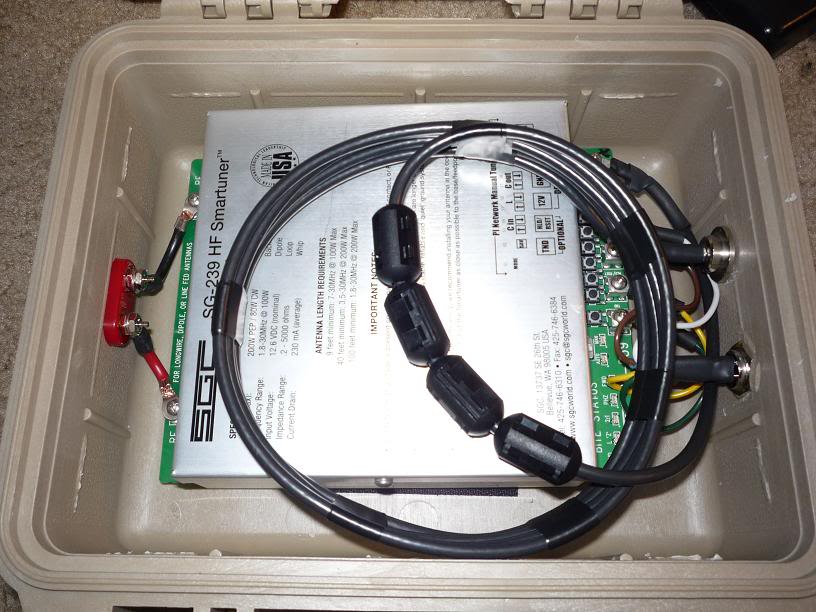
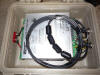
Ok today the pelican case came in! I made a run to the local electronics
store to get some supplies to put this thing together. I still need to weather
seal the Mic plug and the binding post. The N bulkhead connector has an O-Ring
seal. I used adhesive Velcro to secure the tuner to the bottom of the pelican
case. I need to get some desiccant to add to the case, it gets a little humid
here.
Here is some of the pictures, let me tell you it felt wrong to pull that pelican
case out of the box and drill holes in it!

And here is the rig put together. I have since built a PSK interface and CI-V
controller. I may pickup a Signal Link to mount into the box, for portable
operations. But for now, I am enjoying using a completely homebrew interface,
and feel that making your own stuff is the spirit of ham radio.
As it sits here is a parts list for the box,
Box: MTM Spud 7
Radio: Icom 706
Power Supply: Radio Shack 19 amp
Battery: 17ah SLA Battery
2 meter amp: RF Concepts
Tuner: SGC 239
Also have an Icom to SGC interface, Battery Tender JR trickle Charger,
Circuit protection panel, PSK homebrew Interface, and a small 5 Watt Solar Panel
for battery maintenance in the field.
04/26/2012
This box has undergone so many revisions.
September 28 2013
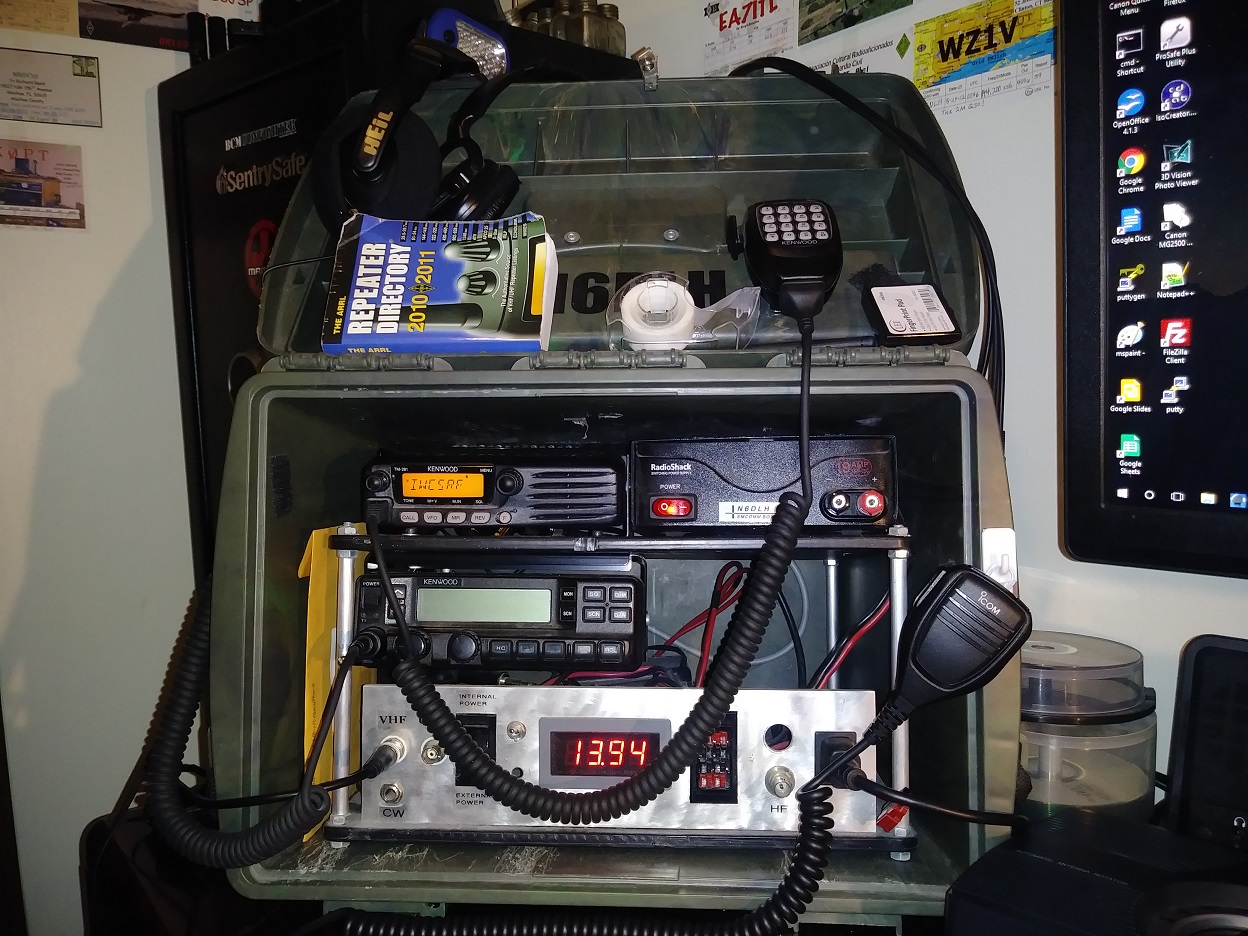
Well much has changed, and for a while it was taken apart. That only lasted a
short time. Currently all batteries and chargers have been removed. The
radio's have been switched to Kenwood's. I am using a TK-790 VHF radio, and a
TK-890 UHF radio. Both are fully programmable, and allow all of the front panel
buttons to be programmable. These must be programmed via Kenwood KPG-44d
programming software and a special cable. These are Mil Spec radio's for shock
and vibration, and an IPC rating for driving rain and humidity. The TK-790 can
be programmed and used on the 2m band with no modification. The TK-890 does need
the VCO to be tuned for the band. Currently the PLL will unlock below 442 mhz.
The VCO will go lower, but I wanted to be able to pick up the local fire
department and GMRS/FRS frequencies. So I lost 2 repeaters that I can not hit
from the house, so it was a good compromise. The total band width of the VCO is
around 24-25 khz.
|