Before we can use QSSTV you need to set some configuration options.

The configuration tool is accessed through the "Options" menu in the receive window. The following tabs are available
- Operator Settings
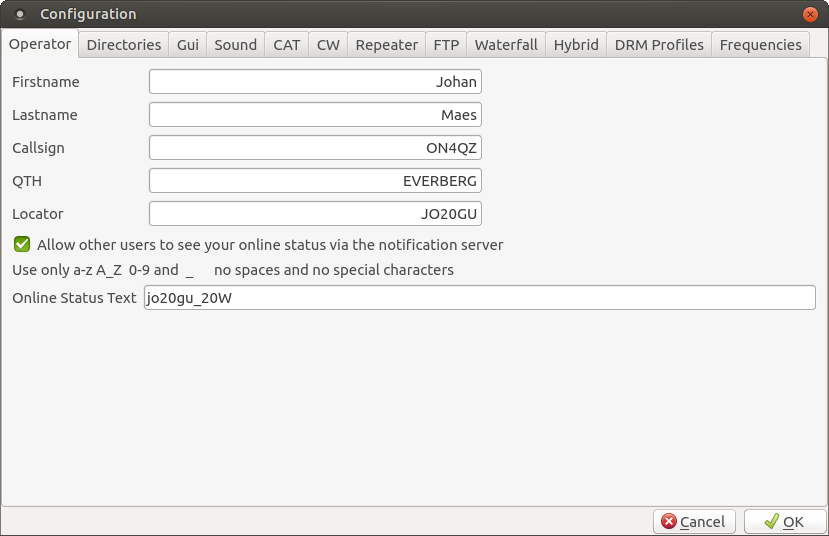
- Call sign
- First Name
- Last Name
- QTH
- Locator (Grid Square)
The above information can also be used in templates (see also Editor version 9.2 and 9.3 Editor version 9.4)
- Allow other users to see your online status via the notification server
The text will be added to the notification send to the hybrid server
- Directories
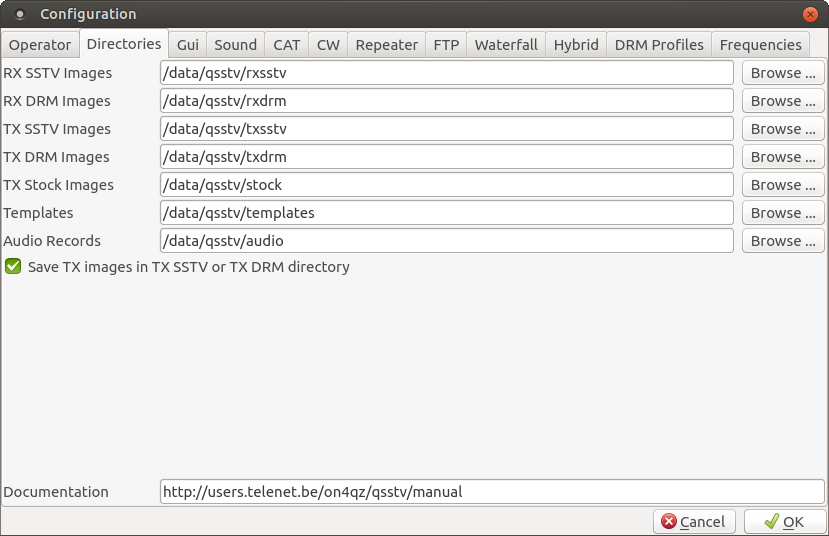
- RX SSTV Images: directory for saving the SSTV received images
- RX DRM Images: directory for saving the DRM received images
- TX Images: directory for images to transmit
- Templates: directory where the template files are stored
- Audio Records: directory for audio files (where you save/read recorded audio files)
- Save TX images in TX SSTV or TX DRM directory: if selected the TX image will be saved
- Documentation: URL of the user manual (if you copied the manual locally then you can point to it with e.g. file:///usr/share/doc/qsstv/manual
- Gui
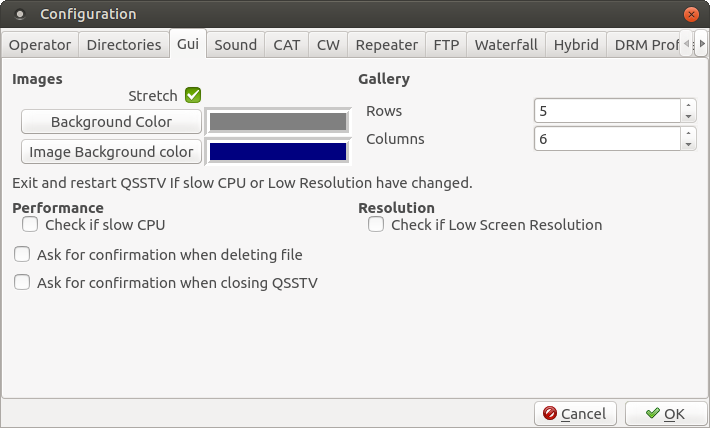
- Stretch: if checked, the image will fill the receive window (keeping the aspect ratio) else it will be displayed as is.
- Background Colour: colour used for image borders and background in the gallery
- Image Background Colour: Default image background Push the push button to select the colour selector.
- Gallery: Rows and columns: set-up the number of rows and columns to be used in the Gallery tab. If you're running on a slow CPU (like on a Raspberry Pi) select row=1 and columns=1.
- Slow CPU: Select this option if you're running on a slow CPU (e.g. Rapsberry Pi)
- Low Resolution: Select this option if your display is for example 800x480. This options sets the maximum vertical resolution of QSSTV to less than 480 lines. It therefore removes some features from the receive window (Rx Notification Window in DRM) and the transmit window (Image replay Preview and TX Notifications in DRM mode). You can toggle to and from full screen by using the CTRL_F key combination.
- Ask for confirmation when deleting file: When you delete a file from the gallery it will ask for confirmation before deleting the file, otherwise it will simply delete the file.
- Ask for confirmation when closing QSSTV: if checked, ask: "Are you sure to exit QSSTV" before closing the program
- Audio
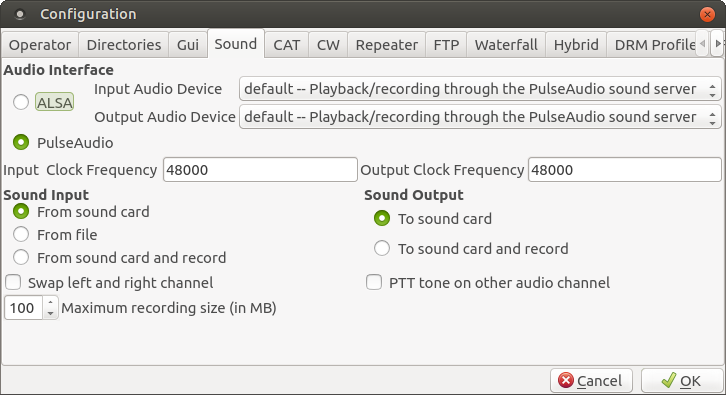
See also Volume Settings
- ALSA Input Audio Device : depending on your hardware (e.g. default,hw:0,0)
- ALSA Output Audio Device : depending on your hardware (e.g. default,hw:0,0)
- PulseAudio: native pulse audio interface
- RX Clock frequency : clock used while receiving SSTV images,(see also SSTV Calibration)
- TX Clock frequency : clock used while transmitting SSTV images,(see also SSTV Calibration)
- Sound Input routing
- From sound card: default mode
- From file: decode a previously recorded file
- From sound card and record: decode and record to a file (wav type, stereo 48000)
- Maximum recording size: limits the size of the recorded file
- Sound Output routing
- To sound card: default
- Playback: playback a wav-file (use 48000 samples per second recording in mono or stereo)
- Playback and record: playback the sound and record at the same time.
- Swap left and right channel
- If selected, audio will be sent on the right audio channel instead of the left channel (e.g Kenwood tranceivers using USB sound interfaces)
- PTT tone on other audio channel
- A tone will be sent on the right channel to enable PTT. If the above "Swap left and right channel" is selected, it will be sent on the left channel.
Note: To playback an audio file, be sure the format is of type wav and has a samplerate of 48000 samples/second. You can always open the file with audacity and export the file to adapt the type and/or samplerate
- A tone will be sent on the right channel to enable PTT. If the above "Swap left and right channel" is selected, it will be sent on the left channel.
- CAT
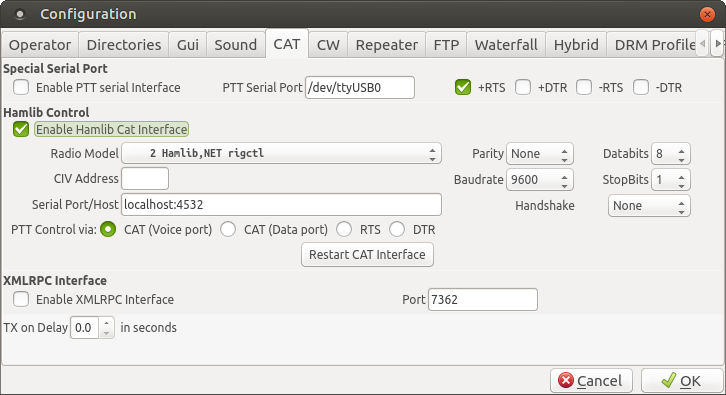
- Special Serial Port: If you have a separate serial interface to control the PTT you can enable Special Serial Port to control it. You can select RTS and or DTR in inverted or non-inverted mode (i.e. +RTS will assert RTS at +12V when the PTT is active and -RTS will assert RTS at -12V). +RTS and/or +DTR is used most of the time. The same goes for DTR.
You cannot select both +RTS and -RTS or +DTR and -DTR at the same time. - Enable Hamlib Cat Interface
- Radio Model: drop down list from the radio models
- CIV Address: only used for ICOM, if left empty, the default address of the radio will be used
- Serial Port/host: either the serial port (e.g. /dev/ttyUSB0) or the host address (e.g. localhost:4532)
- Handshake, Parity, Data bits, Stop bits, Baud rate: serial port settings
- PTT Serial Port: serial port (e.g. /dev/ttyS0) only used if "Enable PTT serial Interface" is selected
- PTT Control via: If the radio uses a CAT command to activate Transmission then select "CAT". If you have a radio that does not support such a CAT command, you can let Hamlib use the RTS or DTR on the serial port specified by "PTT Serial Port".
- There are 2 CAT ports: -CAT (voice port): the normal setting -CAT (data port): to be used with some kenwood tranceivers(e.g. kenwood TS-480) to force data port instead of audio port (source: David VK3DCU) Example: IC-706MKIIG via a cat interface such as interfaceOne.
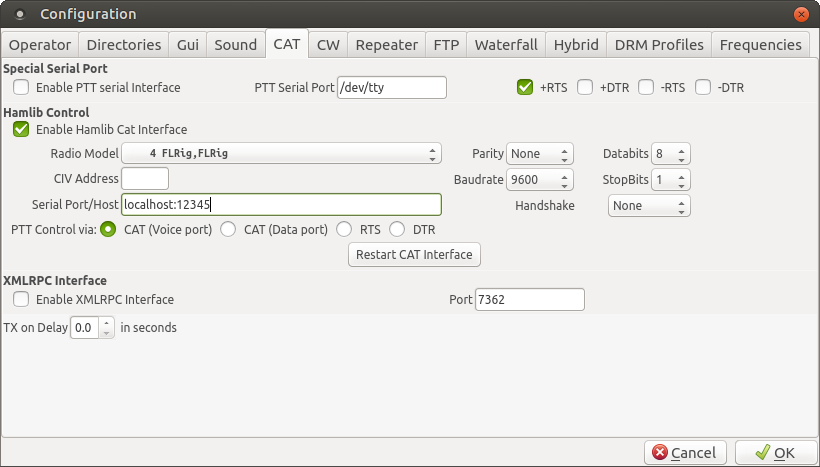
- Enable XMLRPC This allows you to connect to the Flrig program using the XMLRPC protocol. Flrig will handle all the communication with the transceiver (including PTT). The Flrig version must be lower then 1.3.4x
- TX Delay: The program will wait for the selected delay before transmitting any audio.
Note: The option Enable XMLRPC excludes the use of hamlib.
A sample set-up of Flrig (version <1.3.4x)is shown below.
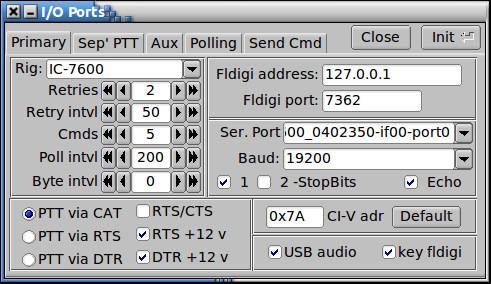
You can now also connect via Hamlib to Flrig (model number 4). There are two prerequisites
- Hamlib version 3
- Flrig 1.3.4x or higher
- CW
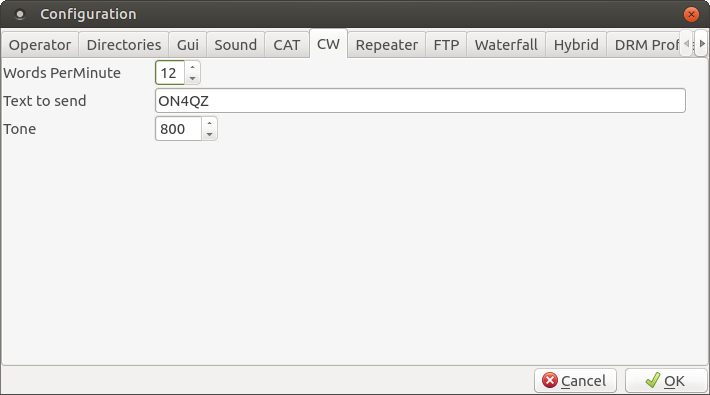
- Tone: frequency of the CW tone
- Words per Minute: CW transmission speed
- Text To Send: this text will be send at the end of an image transmission if the option is enabled.
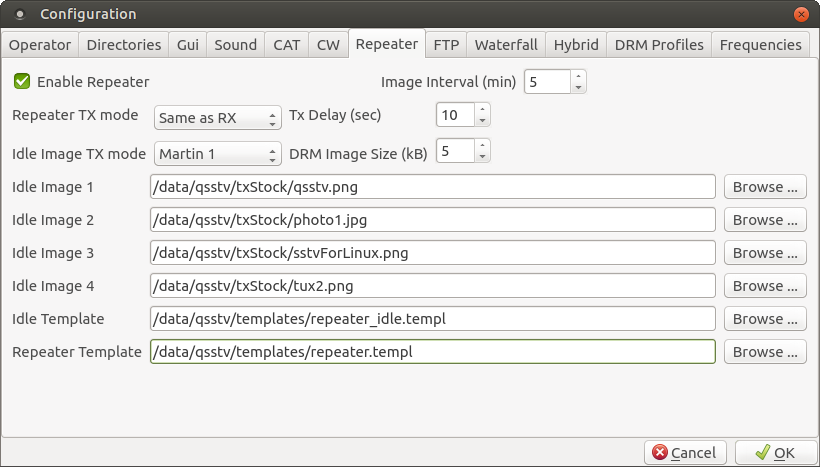
- Enable repeater: enable repeater operation
- Image Interval (min): interval time before sending one of the Idle Images
- Repeater TX mode: the mode the repeater will use to send the images
- Tx Delay(sec): Wait x seconds after reception of an valid image before repeating the image
- DRM Image Size (kB) : The maximum size of the image used in DRM mode
- Idle Image[1-4]: images send by the repeater if there is no activity for more than the interval time
- Idle Template:template that will be super-imposed on the idle images
- Repeater Template: template that will be super-imposed on the repeated(received) images
See also Repeater
- FTP
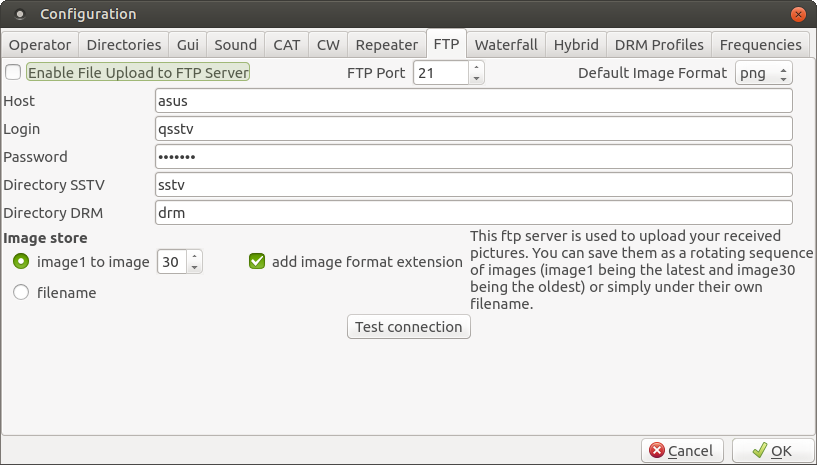
This is used to save the received images to an FTP server. The images will also still be saved in the local rx folder.- Enable FTP: enable ftp operation
- FTP Port: default 21
- Default Image Format: select the image format from the drop down box
- Remote Hostname: hostname of the ftp server (e.g. myftp.home.net or 192.168.0.1)
- Remote directory:the ftp server directory where you'll store the images
- FTP Login name: your login name on the server (can be anonymous)
- FTP Password: if you need one, otherwise leave blank
- Image store: image1 to image30: The files will be saved under the generic name imageXX, where xx ranges from 1 to 30. When a new image arrives, the old images are shifted down (i.e. image29 becomes image30, image28 becomes image 29 etc ..) and the new one is stored as image1.
- add image format extension: if checked, the xetension is added to the filename (e.g. image2.png)
- file name: the image (or other type of file) is stored with a file name derived from the mode (SSTV) or from the file name transmitted in DRM.
Note: This FTP server is unrelated to the FTP server for Hybrid Mode.
You can test the connection by clicking the Test connection button. It will set-up a connection to the server and send a test file to check if all parameters are correct. You will either see a pop-up with "Connection OK" or an error message showing the reason of the fail.
- Waterfall
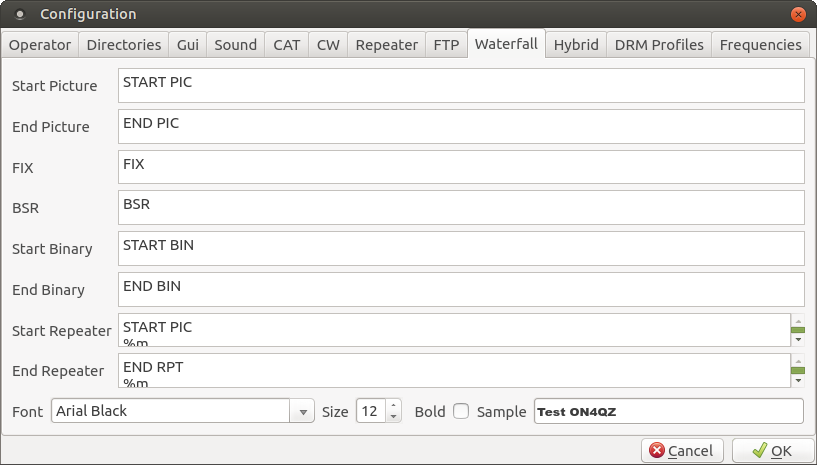
- Start Pic: Waterfall text to send at the beginning of a DRM transmission
- End Pic: Waterfall text to send at the end of a DRM transmission
- FIX: Waterfall text to send at the beginning of a DRM retransmission
- BSR: Waterfall text to send at the beginning of a DRM request for retransmission
Note: you can also use macros (e.g. m, q ...) in the text (see macros)
- Hybrid
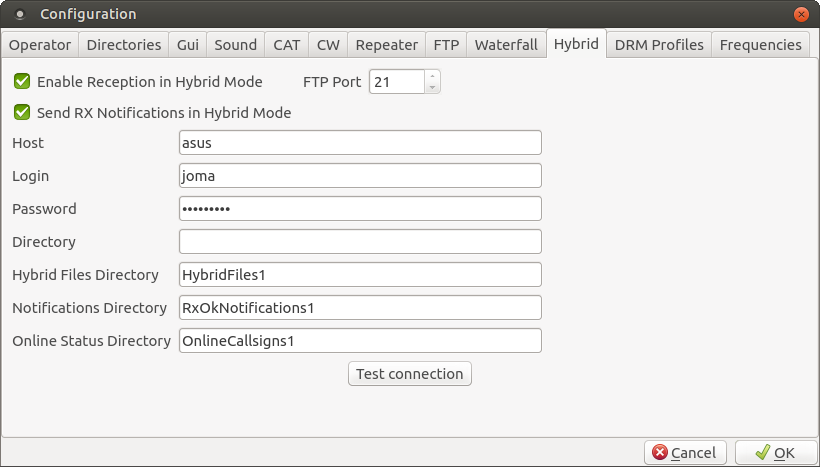
- Enable Reception in Hybrid Mode: allows reception of hamDRM in hybrid mode. If not enabled, hybrid mode files will not be shown or stored.
- FTP Port: default 21 (cannot be modified at this moment for compatibility with EasyPal)
- Send RX Notifications in Hybrid mode: The notifications will be send to the server used by the sender
- Host: hostname of the ftp server you will use
- Host: the ftp server where the hybrid images will be send to.
- Login: the login name on the server
- Password: will be encrypted
- Directory: default empty
Login name, password,hostname and directories will be encrypted before being sent on the air.
The directories on the FTP server must be created at root level.
- HybridFiles1 – where the hybrid files are uploaded
- RxOkNotifications1 – where the notification are sent when receiving an DRM image
- OnlineCallsigns1 – where the call sign and info text is sent
If a directory is specified (e.g test) then the following directories must be cretaed:
- test/HybridFiles1
- test/RxOkNotifications1
- test/OnlineCallsigns1
QSSTV will not create those directories for you.
You can test the connection by clicking the Test connection button. It will setup a connection to the server and send a test file to check if all parameters are correct. You will either see a pop-up with "Connection OK" or an error message showing the reason of the fail.
There are some public servers you can use. Have a look at http://www.easypal.org/
- DRM Profiles
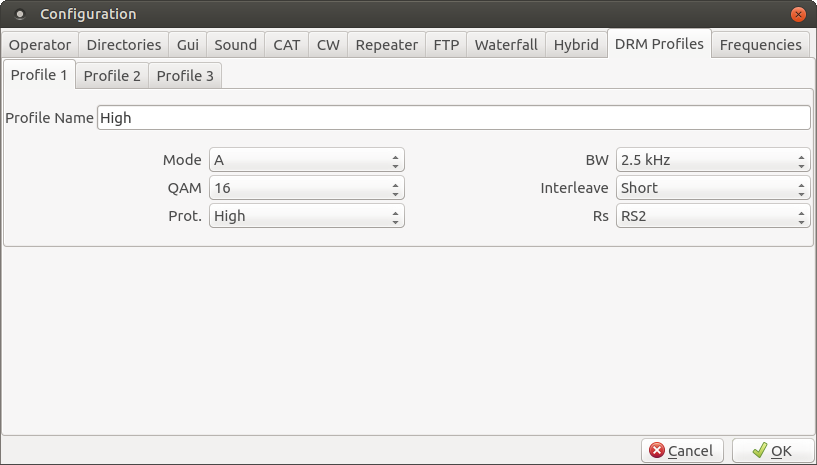
Used for quick selection of the most common settings you use in DRM. Choose a short name for the profile and make a selection for all the parameters. The name will appear in the Profiles drop-down box in the Transmit window for DRM.
See
- Frequencies
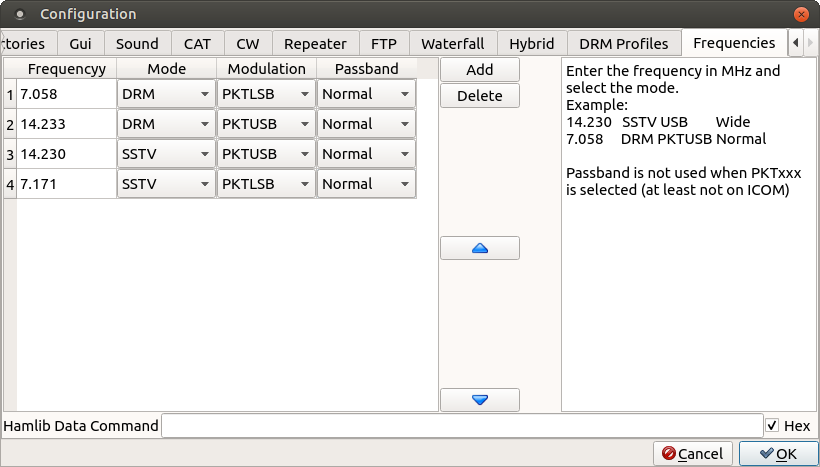
- List of selectable frequencies. Click Add to add a new combo frequency/mode/modulation/passband. Enter the frequency and select the mode,modulation and passband type.
To move a frequency/mode/modulation/passband up or down the list, click first on the entry in the table and then click on one of the arrow buttons. - Filter 1 will be selected if PKTxxx is used on ICOM (hamlib limitation).
- Hamlib Data Command: (only used with Hamlib) Hamlib Data Command allows you to send a "raw command" that will be executed when you change frequencies.
- Example: FEFE7AE01A060101FD and Hex button checked: will put the Icom in data mode D1 (LSB, USB or FM) and the Filter 1.
- Hex: if checked the text is interpreted as hex values else it will be interpreted as a regular ASCII string.
- Note 1: you can put any valid raw command here, it will be send on every frequency change
- Note 2: Flrig does not support FM data modes.
- List of selectable frequencies. Click Add to add a new combo frequency/mode/modulation/passband. Enter the frequency and select the mode,modulation and passband type.