How to measure the impedance of a microstrip Transmission Line
Iulian Rosu, YO3DAC / VA3IUL
http://www.qsl.net/va3iul
This is a procedure how to measure the unknown impedance of
a microstrip Transmission Line printed on a PCB.
For this test you need a Network Analyzer and a Smith Chart
software as WinSMITH.
To measure the impedance at a specific frequency is
recommended that the length of the microstrip TL to be longer than a quarter wavelength
(λ/4 or 90º). For example longer than 31 mm at 2.4GHz.
- If the printed microstrip TL has a connector
connected to one
end (SMA or whatever) go to step nr 6.
- If the microstrip Transmission Line do not have a
connector attached to one end (the TL is in the middle of the PCB) you have to
use for the measurement a thin 50 ohms coax cable (flexible or semi-rigid)
which has an SMA connector attached to one end.
- Calibrate the Network
Analyzer for One Port Reflection using
this thin 50 ohms cable. For calibration connect the SMA connector to the
Network Analyzer, and for the other end of the coax cable use
nothing for OPEN, solder the center with the shield for SHORT, and solder two 100
ohms resistor in parallel (resulting 50 ohms) for LOAD. The reason soldering
two resistors in parallel is to minimize the parasitic inductance of built
load.
- After calibration do a quick
check measuring Return Loss (S11) of this cable having the two parallel 100
ohms resistors connected. The Return Loss should be better than -30dB,
otherwise the quality of the coax cable that you are using is poor and you
have to replace it.
- Remove the two 100 ohms resistors and connect the coax
cable to one end of your TL printed on the board.
- At the other end of the TL solder to the ground a 100
ohms SMD resistor.
- Using the Network Analyzer (Smith Chart format) measure
S11 of the line. On the Smith Chart you can see a half-circle if the line is
λ/4 (90º) or a full circle if is λ/2 (180º).
- Using the Analyzer Marker read the Z impedance of the line
where the circle (or half-circle) is crossing the symmetry axe of the Smith
Chart (left side, opposite of the 100 ohms reference).
- The reading for a perfect 50 ohms Transmission Line will
be 25 ohms. If the reading is different than 25 ohms means the TL is not 50
ohms.
- Open WinSMITH and insert a series Transmission Line. Set
the operating frequency. Set 50 ohms for Reference. Set 100 ohms for Load R.
Set 0 ohms for Load X. Set Length to 90º.
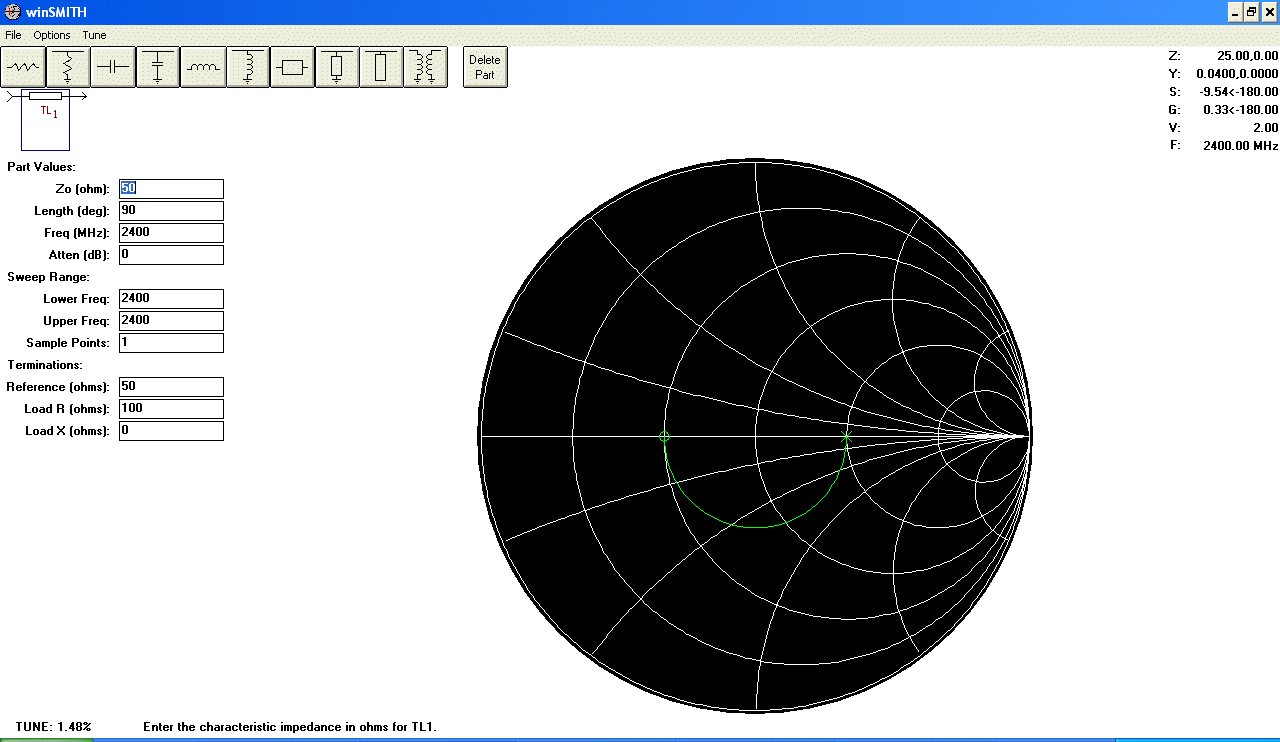
- Highlight the Zo value (default is 50
ohms). Point the mouse
cursor on the symmetry axe until you read Z on the up-right corner equal to
the value you read on the Network Analyzer.
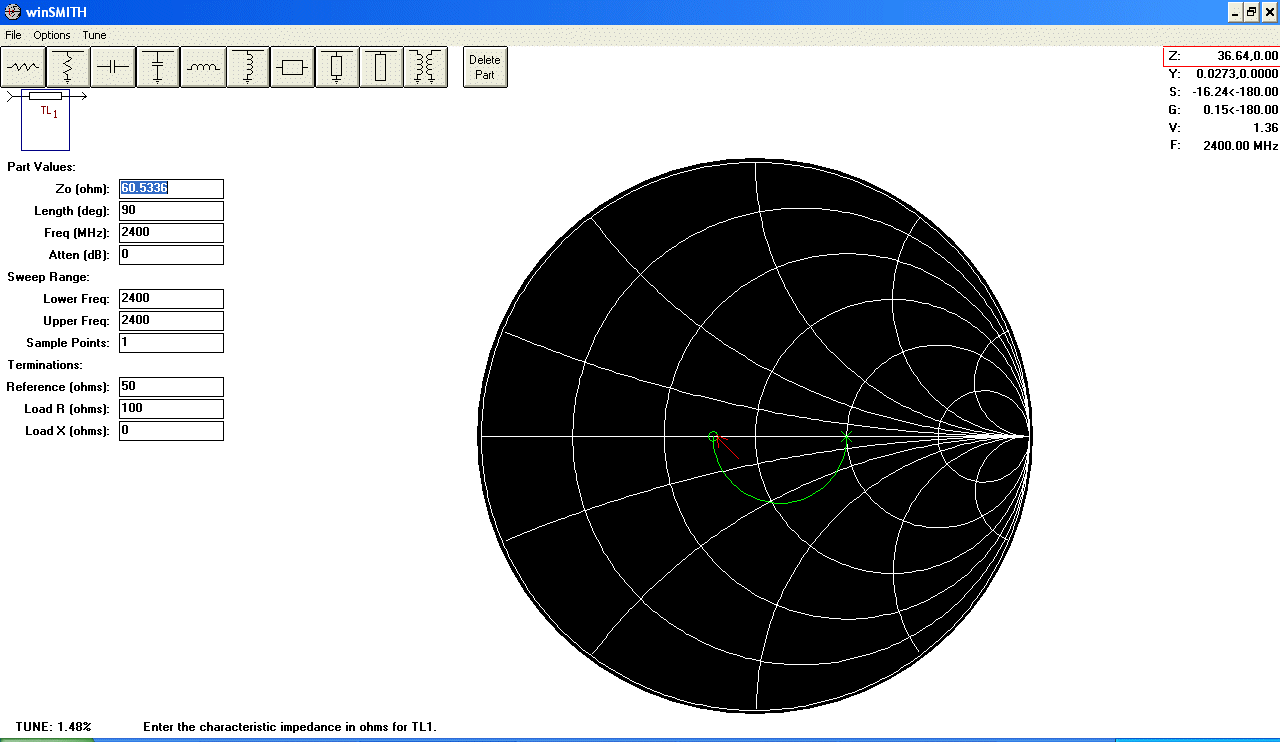
- Tune Zo using PageUp and PageDown keys, until the circle
reach the impedance pointed with the cursor. This is the actual impedance of the
printed Transmission Line.
- For example if you read on
the Network Analyzer a value of 36 ohms (left side of the semi-circle where
intersect the symmetry axe) means the impedance of the printed Transmission
Line is 60 ohms.
home