I cut the lights for the trunk open, and added 2 LED strips in each, and wired them to the brake lights and turn signals. I went to the junk yard and picked up some rear lights from a 1996 Thunderbird, since they are all red, and do not have the black strip on the bottom, and look better.
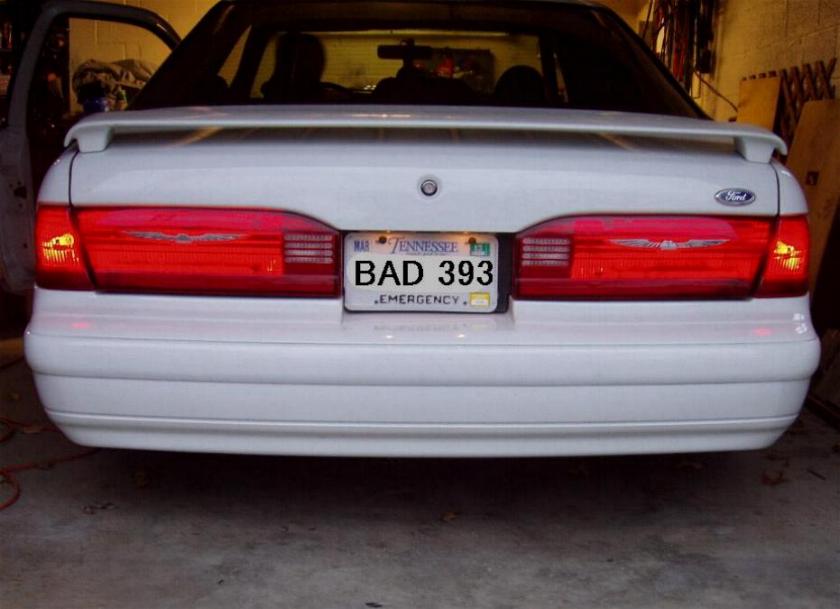
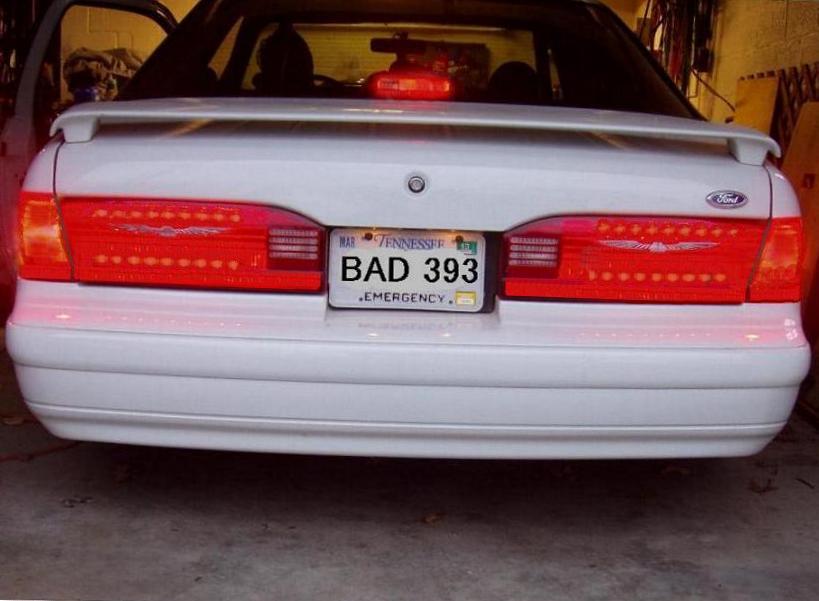
Here is the finished lights. The top is tail lights only, and the bottom is brake lights. They work with the turn signals also.
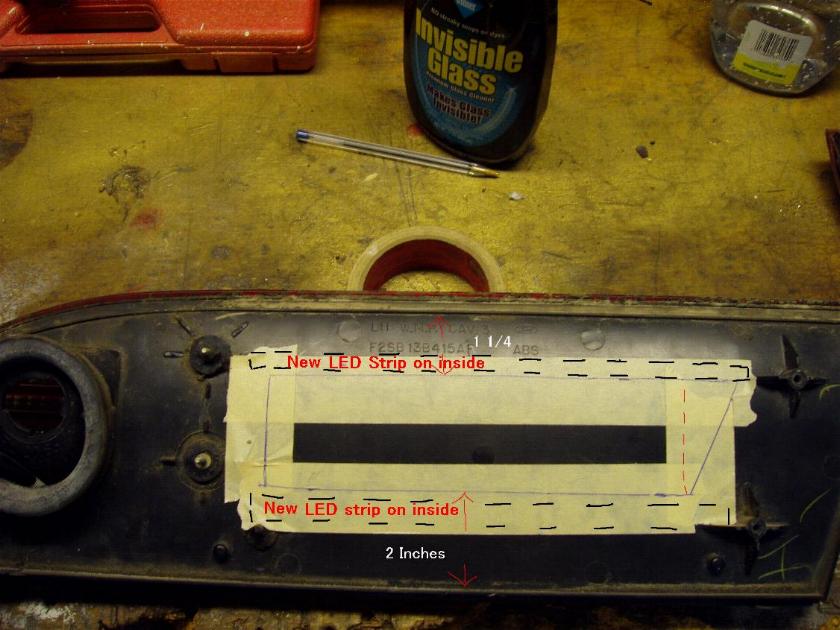
I cut each light open and added 2 additional high output led strips to each. Now the original leds work the tail lights, and the 2 new ones are wired to the brake and turn signals. After testing, I resealed them with epoxy. If anyone wishes to do the same, I can email you a sketch of where to cut, and what LED strips I used. This is how they should of come from the factory.
To add Brake and Turn Signal function to the tail lights mounted on the trunk, you will need to remove them, and cut them open to add LED strips. These lights are not glued together, they are industrially melted together, so using a heat gun will not help to melt any glue, just melt the lights.
I decided to add 2 strips, 1 near the top and the 2nd just above the factory led strip. The photo below is how I cut mine. This allows easy access to install the strips, feed the wires through to the same place the factory led strips wires are routed. The lower cut is high enough to stick the new led to the inside of the housing, just above the factory led, and the upper strip just above the Thunderbird logo so it does not interfere with the light.
Use a piece of stiff wire to put through the slit near the backup lights, and connect to the new strip wires to pull the through. Use small needle nose pliers or forceps to reach in and pull the wire through the hole.
To keep the reflective evenness of the lights, the opening you made needs to be covered with either the piece you cut out, or you can make a reflective patch. Some silver duct taped to the sticky part of a larger patch can be placed over the opening so the silver covers the opening, and provides the reflective surface inside the lights, and does not show up as a dark spot.
The + wires need to be spliced into the brake/turn signal wire at the corner lights, and the - wires to the black wires at the corner lights.
I will tweak the adjuster if needed. They looked
very white, till I turned on the led yellow/white
switcbacks. The clear corners are very white and
bright till I hit the turn signals, then they show
yellow.
The above lighting mods should be more than adequate for anyone, unless you do a lot of high speed driving out in wide open areas. Using Silverstar Ultra 9005 for the low beam is about as good as it gets if you have good clear lens. You can improve on the 9005 or 9006 for high beams if your car has good reflectors and good clear lens.
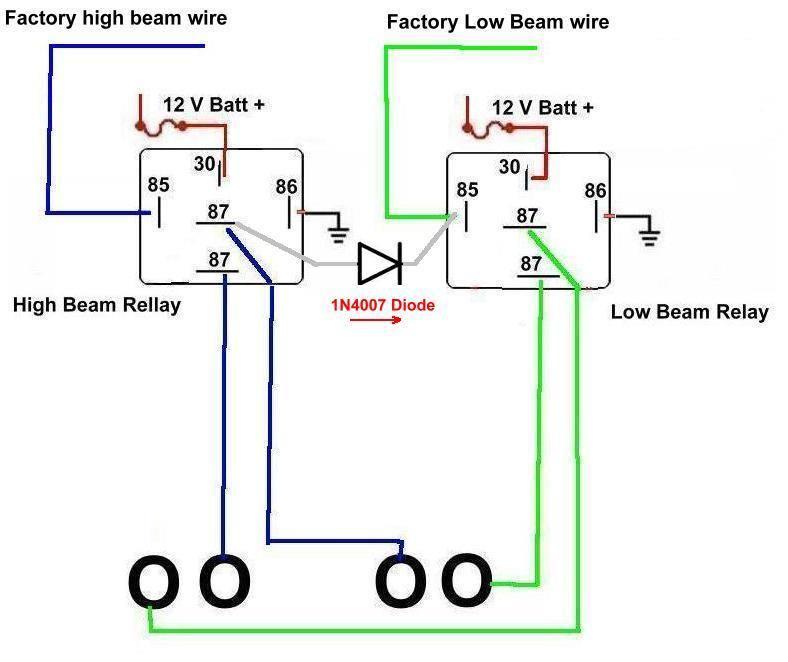
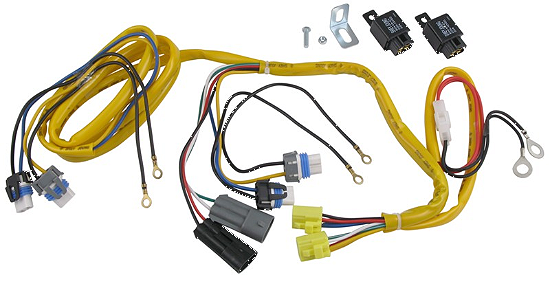
If you are not wishing to fabricate your own harness, this one will work with 9005/9006 bulbs. If you wish to have the low beams on with the highs, you would need to simply add a jumper with the diode in it between the two relay sockets, correctly oriented. If you are going double 9005s, you will have to replace the 9006 pigtail, with a 9005 one, that are available at most parts stores.
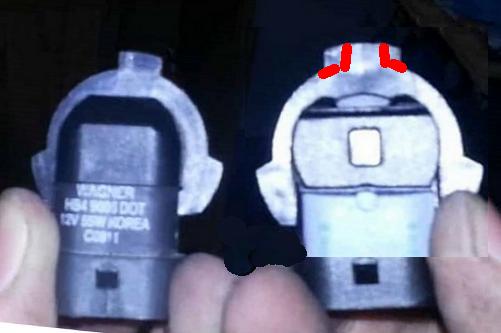
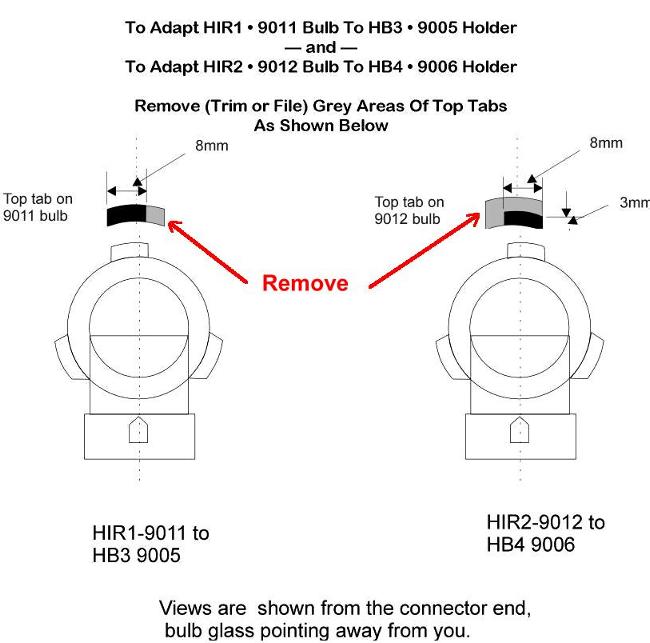
A direct replacement and upgrade for 9005 high beam, is using 9011 HIR1 bulbs. They are direct plug in, except the 3 plastic mounting tabs are aligned slight differently at the center tab, but easily trimmed with a dermal.
The 9005 high beam has aprox 1700 lumens, while the 9011 has 2300, and a better pattern
for long distance.
9006 Low beam 1,000 lumens
9005 High beam 1,700 (can be used as low beam with different pigtail
and trimmed center tab)
9011 HIR 2,300 "
The low beam and high beam take differant plugs that you can
get at Advanced Auto, or most any of them.