** FLDIGI **
STEPS
TO CREATE WATERFALL IMAGES
** IN FLDIGI **
Download my Creating a Waterfall Image.pdf
PREREQUISITES
Required software needed:
Download and install FLDigi and FLRig from http://w1hkj.com/
Download and install Gimp from https://www.gimp.org/
Download and install Coagula Light from https://www.abc.se/~re/Coagula/Coagula.html
- Unzip and Extract Coagula files to C:\CoagulaLight1666

SECTION 1.
Selecting and Editing your Image
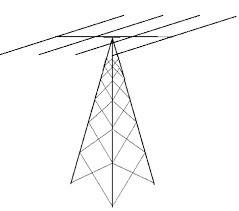
- Go to https://images.google.com/
- Select a clip art line image with a white background
- Save image file to your computer Downloads folder (example: antenna.jpg)
Editing your Image with GIMP
- Navigate to your Downloads Folder and open your saved image and right click and select Open with Gimp
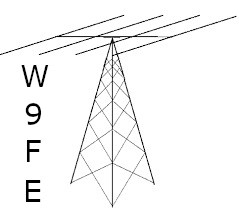
- Make any desired text edits to the picture with Gimps tools (Callsigns, etc)
- Click on the Text Icon (the A symbol) or from the Menu bar Tools/Text
- Adjust your desired Font Size for the text
- Draw a text box in within your picture by dragging the Crosshair mouse pointer and creating a box large enough for your text letters.
- Click within your text box and type your text.
- You can adjust your text positioning as needed by adjusting your text box size or dragging the corners around to the desired position.
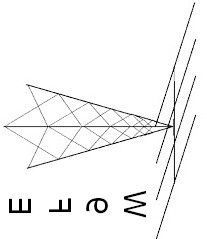
- Save your final picture with a desired new filename with Export / Export as…..with a .jpg extension (Mine is now exported as: antenna-w9fe.jpg)
- Close the current file in Gimp with File / Close All
Transforming your Image with GIMP
Open your newly saved .jpg image in Gimp with File/Open
- Rotate the image…
- Select Image/Transform/Rotate 90 deg. Clockwise
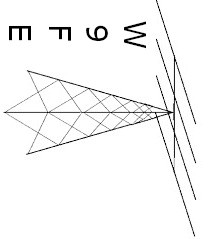
- Flip the image
- Select Image/Transform/Flip Vertically (image text and picture will appear backward)
- Invert the Image to a negative
- Select Colors/Invert (image will look like a negative)
Exporting the final image
- Select File/Export As…..Choose your desired save location, then click on the Export button at the bottom. Make sure image is saved with a .jpg file extension.
- A Popup dialog box will come up…Click Export again. This will export your new inverted image.
- Quit Gimp with File/Quit and select Discard any changes. (NOTE: BY DISCARDING CHANGES, THIS WILL KEEP YOUR ORIGINAL FILE INTACT)
Resize your exported image (If Needed)
- Select File/Open and select your new exported image from your saved location
- Scale the Image…
- Reduce the picture size to less than 350 pixels…with Image/Scale image. Input 350px on Width and hit the tab button to automatically update the height scaling. Click Scale to resize the image
- Select File/Export To (current filename)…...(this will save your resized image to the current filename.
- Quit Gimp with File/Quit and select Discard any changes. (NOTE: BY DISCARDING CHANGES, THIS WILL KEEP YOUR ORIGINAL FILE INTACT)
SECTION 2
Rendering the Image with Coagula Light
Open Coagula Light
- Set up your Render options with Tools/Render Options…leave at the following settings for future renderings…
-
- Render Options Example:
-
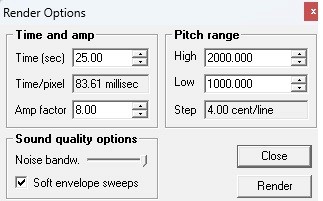
- Time is set to 25-60 seconds. (a longer time stretches picture on waterfall)
- Time/pixel – No Change needed (Will automatically adjust with loaded picture)
- Amp Factor to 8
- High Pitch Range to 2000 (Limits top end of displayed pic to 2000 Hz on waterfall)
- Low Pitch Range to 1000 (Limits bottom end of displayed pic to 1000 Hz on waterfall)
- Checkmark in Soft Envelope Sweeps
- Click Close to close the dialog box
- Set up your file saving options by checking the following options…Leave at the following settings for future renderings….
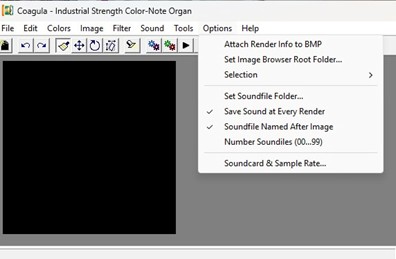
- Save Sound at every Render
- Sound file named after image
Final Image Rendering with Coagula
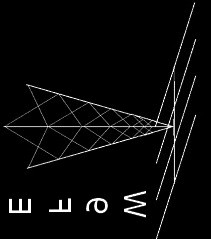
- Select File Open and browse to your saved -inverted image file
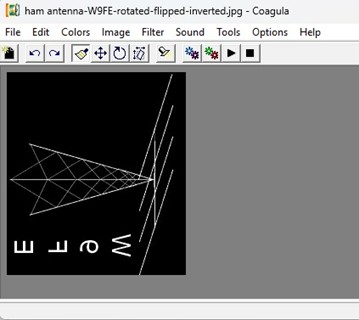
- Select the 2nd Gear Icon (Green and red gear) to Render the image without blue/noise. (Hovering over the gear icon will show the description)
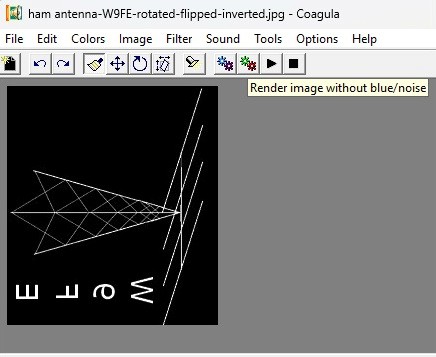
- Program will then scan the image and create a .wav file in the Coagula light folder…
- Close the Coagula program when rendering is finished…File/Exit
SECTION 3
FLDIGI OFF AIR TEST
Waterfall Image Test- Open FLDigi
- Select File/Audio/Playback
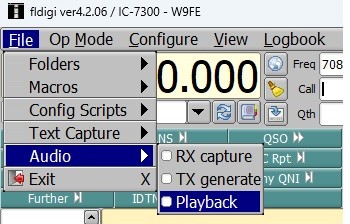
- Browse to your Coagula Light Folder
- Select the newly created .wav file
- Select NO on playback continuous loop popup box

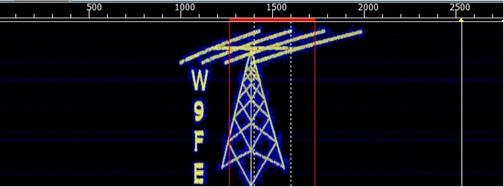
Image will show up correctly in the waterfall
SECTION 4
FLDIGI ON-AIR
Transmitting the image Over RFCREATE A VIDEO MACRO
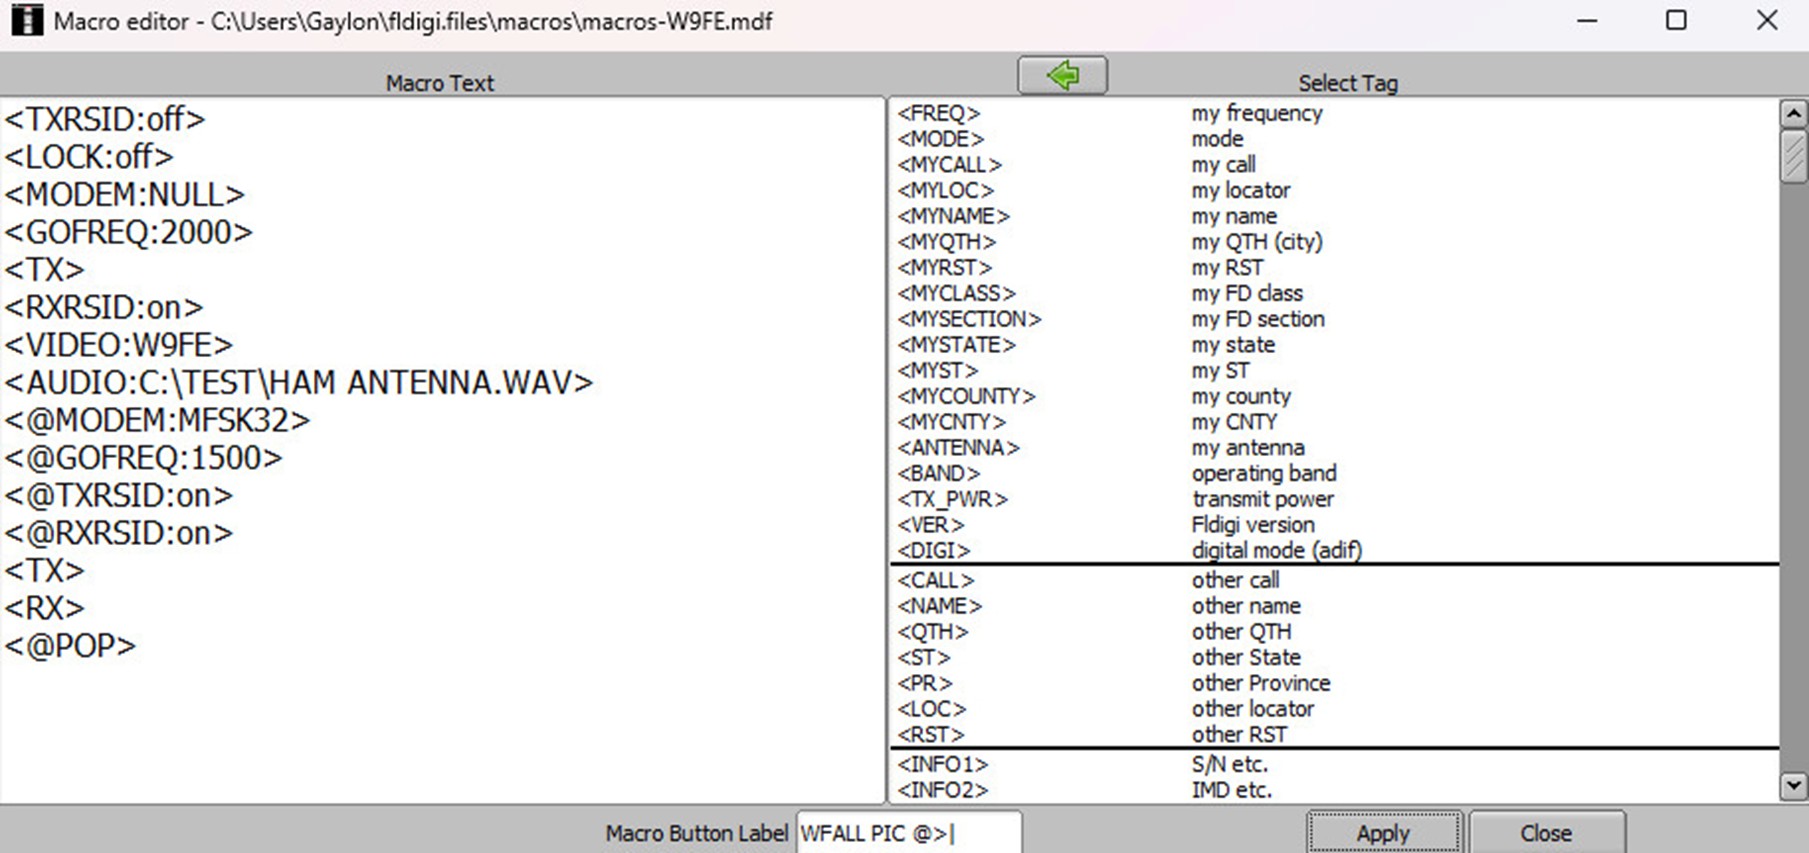
- Right-click on a blank Macro button in FLDigi. This will open the Macro editor.
- Copy and paste the following macro tags below to the left side of the macro editor window.
- NOTE: Change the highlighted callsign below in the <VIDEO:> tag to your callsign.
- NOTE: Change the highlighted path and filename below in the <AUDIO:> tag to your point to your own program path location and rendered .wav file name.
<TXRSID:off>
<LOCK:off>
<MODEM:NULL>
<GOFREQ:2000>
<TX>
<RXRSID:on>
<VIDEO:W9FE>
<AUDIO:C:\COAGULALIGHT1666\HAM ANTENNA.WAV>
<@MODEM:MFSK32>
<@GOFREQ:1500>
<@TXRSID:on>
<@RXRSID:on>
<TX>
<RX>
<@POP>
- Insert a Macro Button Label name for your Macro…example WFALL Pic @>|
- Close the Macro Editor Window. Your macro button should appear with your other buttons.
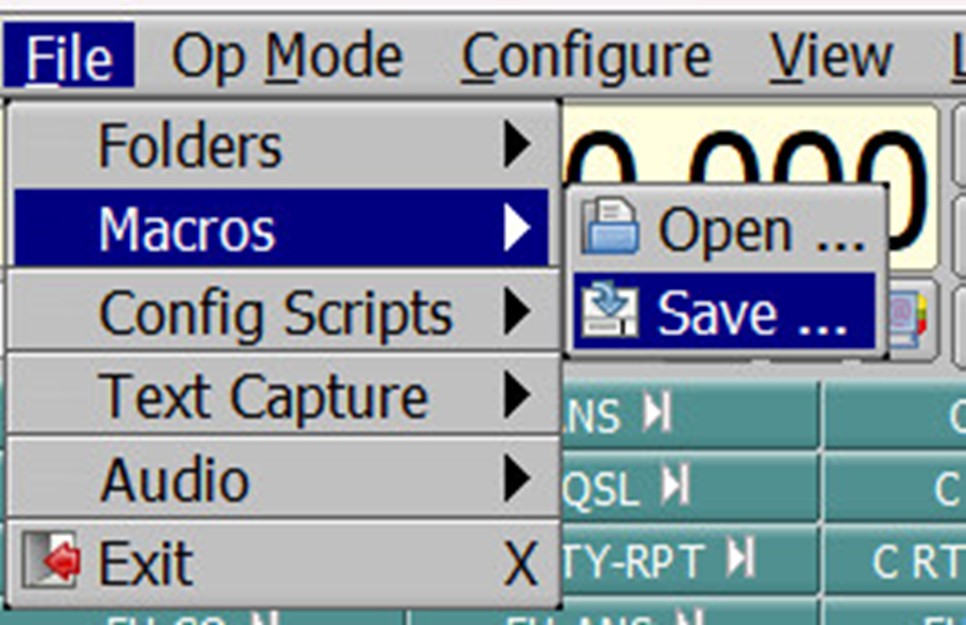
- Save your new Macro button with File/Macros/SAVE. Overwrite your current macro filename when prompted.
- Click the Macro button…the transmitter will automatically switch to NULL Mode and then transmit your callsign on the waterfall.
- The waterfall will stop scrolling and the macro will then begin playing the .wav file of your picture until done (25-60 seconds depending on your rendered time setting).
- NOTE: You will NOT see your transmitted picture on the waterfall during transmit or hear any audio from the sound file during the transmission. It will seem like FLDigi is frozen during transmit, BUT IT IS NOT…BE PATIENT! It’s just playing your audio .wav file.
- Your transmitter will then return to Receive in MFSK32 mode and will be centered at 1500 Hz when the audio .wav sound file has finished.
Congratulations…you have just transmitted your first waterfall image….
Created by W9FE
Updated: 01/11/2025