
An Experiment
in Solar Cooking - page1
How I got started
Up until a month ago I didn't know anything about cooking with the sun. I
became interested in solar cooking after I saw a solar oven on television that
was being used to cook meals. I decided to try building a solar cooker for
myself. I did some research on the internet to see what people were using. I
built a few of the simpler designs that I found, using corrugated cardboard that
I coated with heavy duty aluminum foil, but they just heated too slowly. This is
June, in Minnesota, not someplace near the equator, and I was not happy at all
with the results. I may not know anything about solar cooking, but it just
seemed like an oven ought to get HOT, and I don't mean after 3 or 4 hours. I
made up my mind to try some experiments and come up with something different.
How hard could it be ? I did some more research on the internet and found that
there were four or five basic designs. Some looked expensive or complicated to
make. Some, like the parabolic kind, would pose a greater eye risk than others,
even though they might be more efficient.
After some trial versions, I settled on the type and the following rules
for making my experimental solar oven:
1. The oven would be of the insulated-box type with reflector panels)
2. It should minimize the danger from reflected sunlight (use of flat, rather
than curved panels, and light reflected downward to a non-reflective chamber)
3. It should be made of non-critical, low-cost materials that would be widely
available
4. The size and shape of the oven should not be overly critical
5. It should be as efficient as possible (best use of the sunlight available)
6. It should get as hot as possible (ideally to approach conventional cooking
times)
7. It should not require any complicated math
8. It should not require any special skills and should use readily available
tools
9. It should work with any dark-colored metal cooking pot and not require a high
temp. plastic "oven" bag to operate properly
The following shows the design I ended up deciding to build on. The insulated box collector has two things to consider. The first is heat gain. How well does it capture and convert sunlight to heat. The other and equally important is heat loss. The insulation on the sides, bottom and the lid and seal on top. The sun keeps pouring energy in so the more you can retain, the hotter it gets inside. These are the results I have so far.
Basic Test Cooker
I chose to start out simple, to see how hot a plain black metal bucket would
get. I ended up buying a steel bushel basket at a farm supply store. It measures
17" diameter and 12" tall. I sprayed the inside with high-temp flat black paint.
I wrapped the basket with an old cotton blanket and placed it in a cardboard
box, so about 1" of the basket stuck out the top of the box. I packed wadded-up
newspaper in the corners. I had some of those heat shrink plastic window
insulator kits that use double-sided tape in the basement, so I decided to use
that material for a cover for my tests. I used a type "J" thermocouple with the
tip painted black and a temperature control for a readout. The probe tip was
placed against the black metal base.
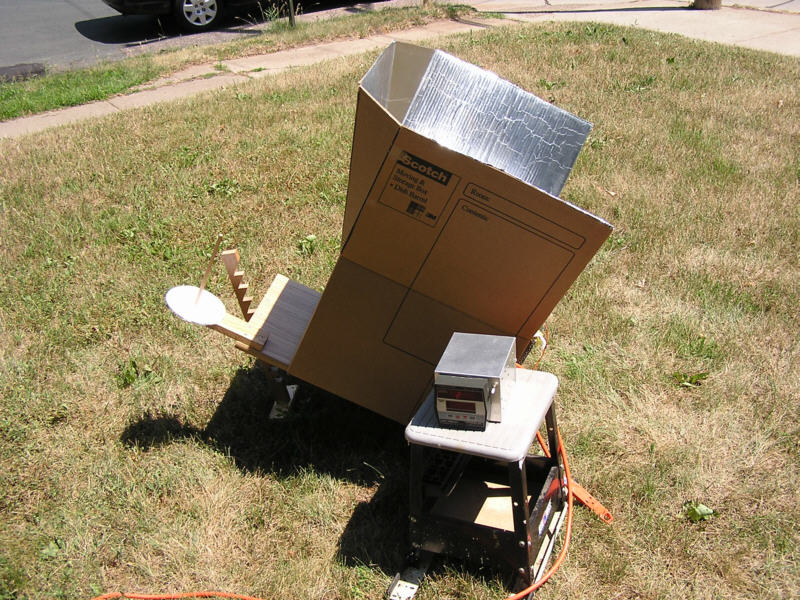
I also built a wooden stand for the bucket with an simple aiming device so that
I could adjust the angles to aim it directly at the sun. A cabinet door handle
on the bottom side rests on the support. It uses a single wood support
stick with notches cut at 1 1/2 inch intervals and a blunt nail on each side of
the base to stick in the ground. The oven stand is rotated around, then the back
of the stand is lifted to center the shadow on the aiming stick.
Started about an hour before midday. After one hour, the temp. of the bottom was staying about 180 F. Too hot to touch. Unfortunately, when the sun went behind a cloud, the temp. dropped rapidly. A problem. I decided that I needed some thermal mass. I ripped off the plastic and added ten pounds of "pea" gravel, about 50% dark/ 50% light rock. A new cover and an hour later the temp. was only getting to 173 F. I cut a circle of black poster board and put it on top of the gravel. This brought the temp. back to 180 F again. When a cloud passed over, the temp. was much more stable with the gravel than without. An added bonus - the gravel can be moved to one side to provide a level base for a cook pot when the oven is tilted (early or late day sun).
Summary
Just an insulated metal bushel basket painted flat black is capable of
reaching 180 degrees. The color of the interior appears to be important and
thermal mass is useful for stability! Probably not quite hot enough for reliable
cooking without using an oven bag, at least in this part of the country, but it
might be hot enough for water pasteurization.
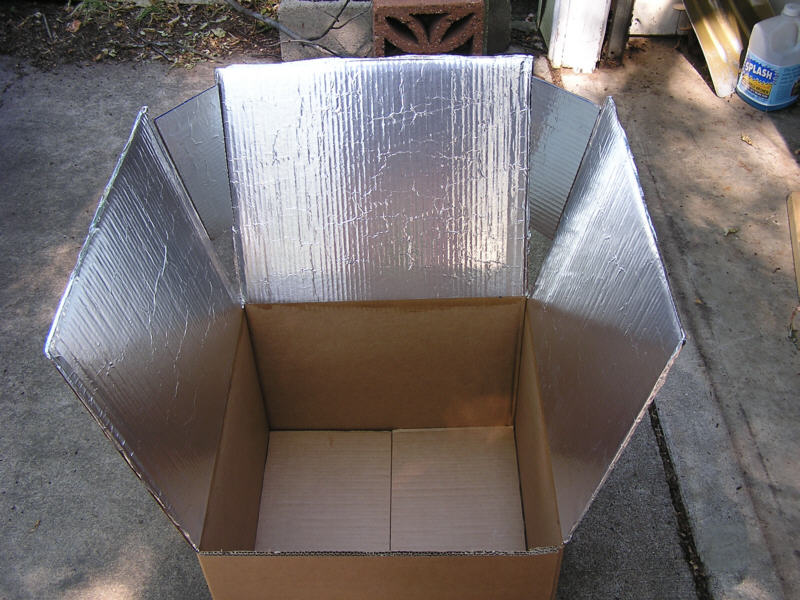
Improved Test Cooker - Adding reflector panels to capture more sunlight.
Note that this oven is built for a test. A big cardboard box isn't the most
mechanically sound design for dragging all over the place.
This is the procedure I used for my test.
Started with 18" x 18" x 28"(size doesn't include end flaps) corrugated
cardboard storage box.
Cut off top flaps and glued bottom flaps.
I sliced partway down all the corners and cut out one section.
Folded out the three remaining sides about 30 degrees, coated them with contact
adhesive, and rolled out 18" wide heavy duty aluminum foil (shiny side up) from
one edge across to the other.
Spread out edges with fingers and trimmed.
Coated two of the flaps I cut off earlier with foil. Let dry. Important
- the panels should be allowed to dry slowly. I let them sit overnight.
Placing them in the sun to dry will cause the foil to expand and pull away from
the cardboard.
Cut triangles from the coated flaps for the corners and glued (To give
reflectors about a 15 degree angle from vertical, which I'd determined earlier
from a test with the box pointed at the sun).
Used some car polish on the foil to retard oxidation.
Wrapped blanket around basket as in in previous test and put metal basket in
box.
Stuffed rags in corners.
( Used same plastic window insulation and double-sided tape for cover)
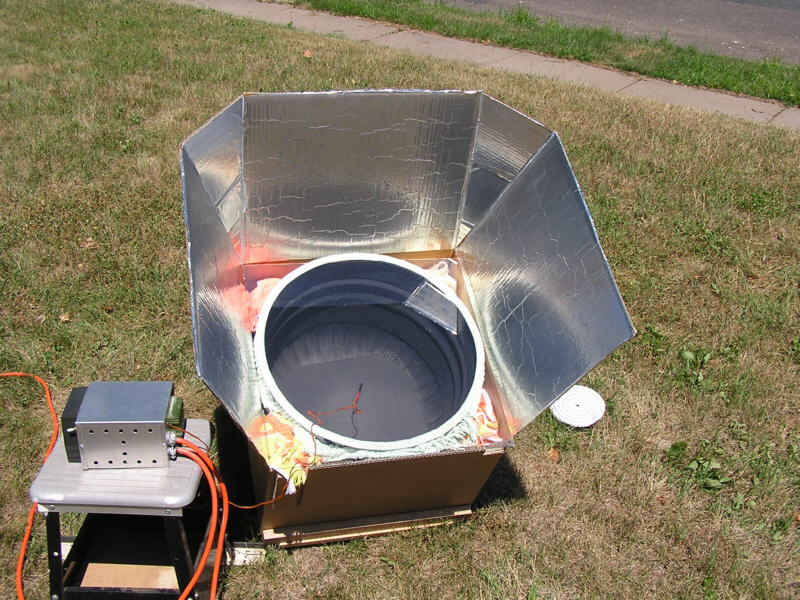

Test of improved cooker
Sun directly overhead, about 1 p.m.
T.C. probe on metal bottom, about 3" from center
Aimed oven at sun.
Started test.
11:45 am 80 F (ambient)
12:05 pm 225 F
12:10 pm 230 F
12:15 pm 245 F
12:20 pm 250 F
12:25 pm 255 F
12:30 pm 260 F
Readjusted alignment of box
12:35 pm 268 F
12:40 pm 270 F
Highest reading - 270 F
1:05 pm Moved probe to center of bottom - measured 278 F
1:10 pm Probe raised about 3" off metal bottom - 235 F
1:15 pm Probe raised about 8" off metal bottom ( about 3" from plastic film) -
230 F
I ran another test using felt weather-stripping glued to the top rim and a pane of window glass instead of the plastic. I wanted a removable top cover. Made a cardboard stop for the box so the glass wouldn't fall off. The resulting temp. was about the same. The window glass got very hot in the center, but was cool enough to handle at the outside corners. Some edging around the outside of the glass might make it a little safer.
Summary
Adding three reflector panels to the design added 90-100 degrees F to the
test result of the insulated basket alone. This could give a person the ability
to move the food being cooked above the 130 - 140 degree range faster, to help
reduce the danger from spoiling. It could cook without the necessity of using an
oven bag ( though using an oven bag would probably make cooking faster). The
addition of the triangular reflectors to fill in the corner areas also helps
reduce the cooling effect of the wind, another source of heat loss.
Test of improved cooker using pea gravel on flat black metal bottom
Sun directly overhead, about 1 p.m.
T.C. probe on metal bottom, about 3" from center
12:40 pm 154 F
12:45 pm 190 F
12:48 pm 200 F
12:55 pm 216 F
1:03 pm 225 F
1:12 pm 234 F
Readjusted alignment of box
Highest reading - 237 F
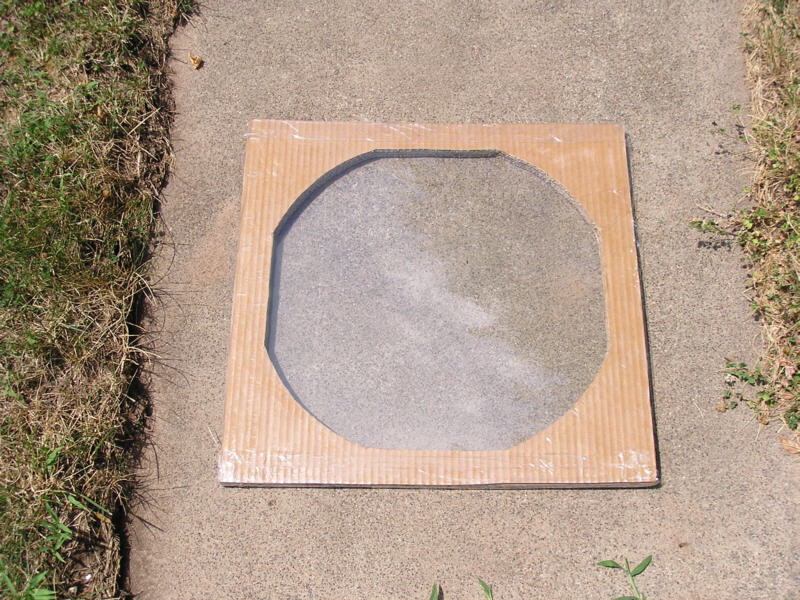
Added black poster board circle over the gravel.
2:00 pm 264 F
Highest reading - 268 F
Summary
Using the 50% dark/ 50% light pea gravel instead of the flat black metal
seemed to make a noticeable difference in the energy absorbed. The color (and
perhaps even the surface shape) could be critical in getting the most
efficiency. The insulation wrapped around the metal bushel basket that I used is
just an old blanket. Doing a more efficient job of insulating would most likely
also improve the performance. A cover with two sides and a layer of air in
between (Like a double pane window design) might hold in more heat also.
A test to see how long it takes to heat a given volume of water - July 8,
2007
Day has some light clouds and slight haze
Used glass top cover with about 1/4 inch open at the top middle to prevent
condensation
Replaced cardboard circle with 12" diameter aluminum circle (Aluminum flashing
material) painted flat black
Pea gravel preheated to 248 degrees with black circle over gravel (wouldn't get
any hotter- overcast sky)
Aluminum pan (black outside) with one quart of tap water inside
12" Flat black painted aluminum circle covering pan of water
Time Temp
10:47 am 248 F
Put pan of water in oven, black aluminum circle for cover ( T.C. probe on inside
bottom of pan)
Start of test
10:48 am 78 F
1050 am 82 F
11:00 am 96 F
11:10 am 109 F
11:25 am 125 F
11:45 am 142 F
11:45 am - adjusted angles
11:55 am 151 F (Light clouds overhead)
12:05 pm 156 F "
12:15 pm 162 F "
12:25 pm 166 F "
12:45 pm 177 F "
12:50 pm 179 F "
Stopped test at 179 degrees
Test time - about two hours (Should have picked a sunnier day)
Summary
The weather has a large effect on the time and the ultimate temp. of the
heating process. I planned to conduct the test to 80 degrees C (176 F) to
simulate a water pasteurization situation. This is well above the 70 C
requirement that I have seen at various internet sites for this purpose. Heating
water to boiling would require a lot of extra energy. It takes large amounts of
heat to change water at 212 F to water vapor at 212 F without any gain in temp.
Also, the higher the temp., the faster the rate of heat loss (The less efficient
the oven becomes). Each degree rise requires increasingly more energy than the
one before. A few clouds or even a slightly overcast day can greatly increase
the time required, this far north. The water might have heated faster with a
tight-fitting lid.
A possible replacement for the glass cover
I laminated some corrugated cardboard sheets at right angles and cut out a
cover, then pre-shrunk a couple sheets of the heat-shrink plastic window
insulator film that I used for testing earlier (Otherwise, it would have ripped
apart the cardboard and twisted it up like a pretzel. Don't ask). I attached a
sheet on each side with a few rows of double-sided tape to form a double-pane
cover with air insulation.
It works like the glass cover, but shouldn't burn you (Little thermal mass) or
cut you like the glass might.
Thoughts on the test results
The times and temperatures for all these tests were obviously not measured
under controlled conditions. The results can vary quite a bit due to passing
clouds and how clear the sky is, but I believe the tests show that there is a
substantial amount of solar energy available, even in a small area, that can be
readily captured. Measured from side-to-side at the top edge, the reflector
panels I used are only 28 inches wide (About 5 sq. ft. of ground space or
"footprint" for the whole oven). The reflector sides that I ended up using were
18 inches by 15 inches (270 sq. in.) each.
Using taller or wider reflectors or adding a fourth one could have improved the
performance.
In a practical heating situation the aiming stick could be used to optimize the
time between adjustments - first aiming the oven at the sun, then turning the
oven away from the sun by a fixed amount. The oven would receive a little less
sunlight, then maximum, then less. Once-an-hour adjustments might work almost as
well as much more frequent ones.
Possible changes for future testing
The side of the box cut off earlier could be coated with foil and used as a
4th reflector. With some sort of support brackets on the sides of the open area
it could be laid in place for heating and lifted out to access the inside of the
oven.
Smooth poster board, or something similar, could be glued over the corrugated
cardboard before gluing on the aluminum foil to give a smoother surface.
Heat from the sun made the reflector foil expand and contract enough to cause
ridges in the foil after only the first test. See the picture above. A better
adhesive, smoother surface, or better way to apply the foil could help (Or maybe
a spray-on reflector surface).
A better way of insulating the metal bushel basket to minimize losses on sides
and bottom.
A clear cover with two sides and a layer of air in between to minimize losses
from the top cover.
A better engineered angle and rotation adjustment method.
Coating the box sides (On the inside) with foil might help reflect heat back
into the metal bushel basket.
A fold-up reflector design would make it more portable.