Pi-Star Set Up
Pi-Star is a software image built initially for the Raspberry Pi (produced by the Raspberry Pi Foundation). The design concept is simple, provide the complex services and configuration for Digital Voice on Amateur radio in a way that makes it easily accessible to anyone just starting out, but make it configurable enough to be interesting for those of us who cant help but tinker.

Pi-Star would not be here today, were it not for the software made by Jonathan Naylor (G4KLX), we started with his DStarRepeater and ircDDBGateway and now support the full G4KLX MMDVM suite, including the extra cross-mode gateways added on by Andy (CA6JAU), I cannot thank these guys for the vast amount of time and effort that they continue to put into their projects.

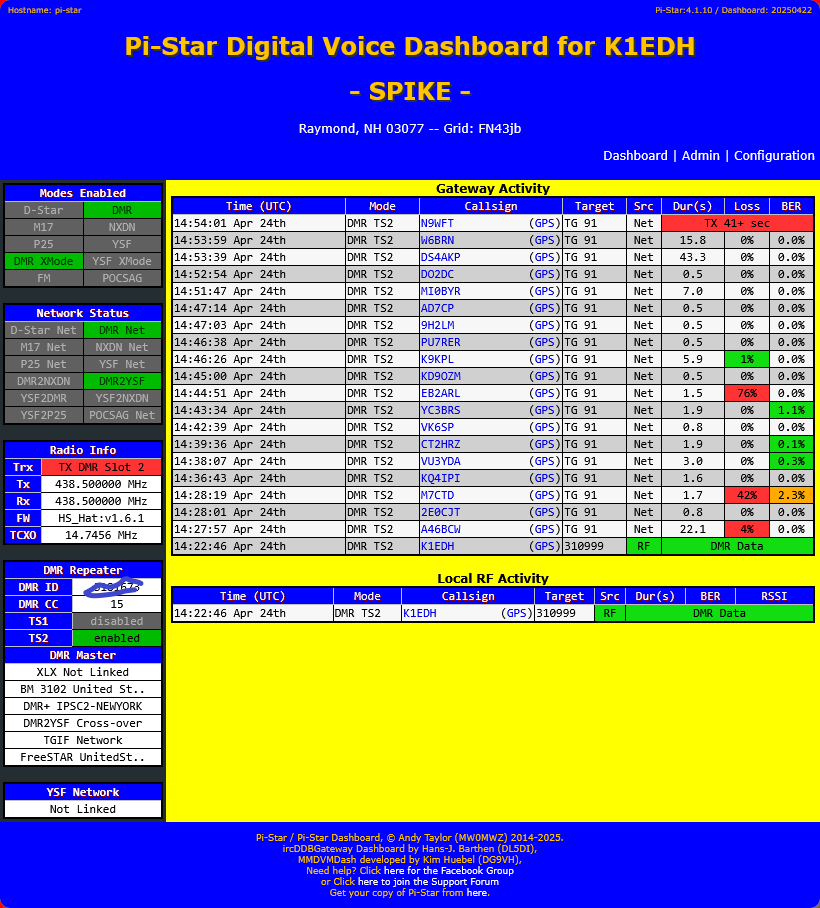
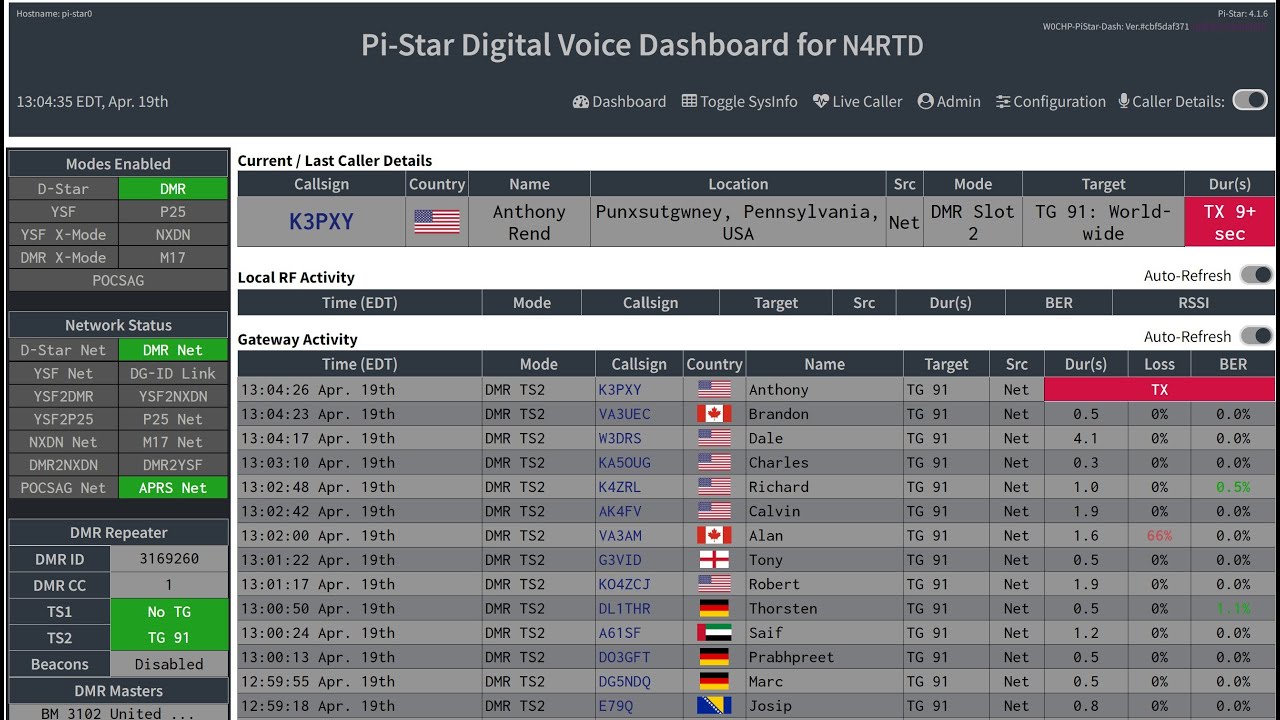
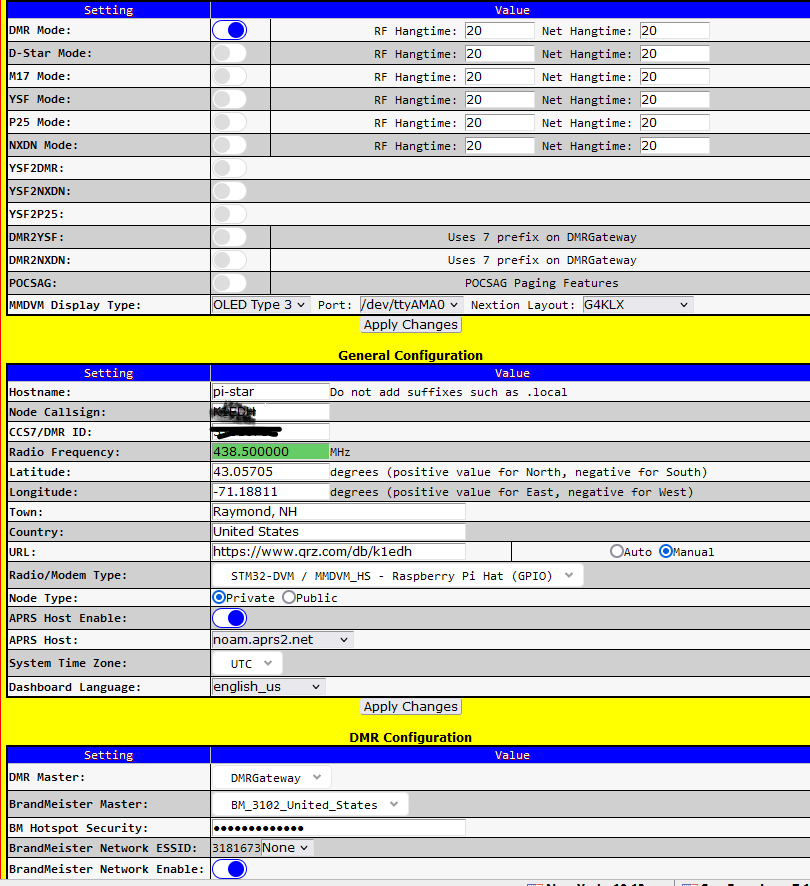
Pi-Star can be what ever you want it to be, from a simple single mode hotspot running simplex providing you with access to the increasing number of Digital Voice networks, up to a public duplex multi mode repeater! The world is at your fingertips, and the choices are yours! If you like to get your hands dirty, delve beneath the simple to use web based dashboard, Pi-Star provides some unique tools to make administration easy, but we also encourage those who want to understand what the system is and how it works to be as involved as they want to be!

But most of all...... HAVE FUN!!!!


Below is the original Pi-Star dashboard by Andy Taylor - MW0MWZ

Orignal Pi-Star Dashboard -- By Andy Taylor


Below is another Pi-Star dashboard by Chip Cuccio - W0CHP

Pi-Star Dashboard -- By Chip Cuccio

You may download the dashboard by Chip Cuccio here.

Setting up your Pi is fairly easy. All You need is a FCC amateur license, and a DMR ID, when issuing a DMR ID, they will require a copy of your license by doing the following on the FCC website.
To get your official copy, just click here and then use your FRN and password and click on "Get your official authorizations here.

There are 5 downloads to go with your Pi. Just click on the one you need and then follow the below videos
Please note these may not be the current versions, you can get them at the Pi-Star download section for your device.

You will also need a good SD card (one with space on it, The more the better). Also you will need a program to flash the SD card,  I use a program called  Belena Etcher which you can download here.

Please go to the Radio Programming Page for more information on how to program your DMR radio.

 Pi-Star Color Chart
Before Setting up your Hot Spot, you need to visit BrandMeister and set up a account and password. BrandMeister now requires this.

Pi-Star Configuration
CLICK APPLY IN EACH SECTION AFTER MAKING CHANGES IN THAT SECTION TO MAKE SURE THEY ARE APPLIED!!
Pi-Star COnfiguration Page
On the left is the basic configuration page for programming your Pi-Star. Currently for  DMR modes, you have: D-Star, M-17, YSF, P25, NXDN modes. Some, which may be used can be used together via cross mode.

Some modes, like: YSF2DMR, YSF2NXDN, YSF2P25, DMR2YSF, DMR2NXDN and POCSAG can be used together but may have to
be used separate from their counterparts.

If you do any changes here, you MAY have to reenter your BrandMeister password since the DMR Net field in the Network status field of your dashboard will be YELLOW.
  1. Now under the MMDVM Host Configuration select your mode and also the type of MMDVM display (usually OLED Type 3).
  2. Now under the general configuration enter your:
    • Call Sign  --  This is your Call Sign
    • DMR ID  --  This is your DMR ID
    • Latitude
    • Longitude
    • Town, State
    • Country
    • Your URL  --  Usually your QRZ url or you website
  3. Select your modem type.
  4. Select if you want to enable the APRS Host.
  5. If you did enable the APRS. Select the host you want to use. It is usually noam.aprs2.net.
  6. Select the system time zone, this will be the time displayed on the dashboard.
  7. Select the dashboard language.
  8. In the DMR configuration section make sure your BM hotspot security password MATCHES your hotspot security in your BrandMeister account under SelfCare or your will not be able to access the BrandMeister network.

Pi-Star Default Dashboard
THIS IS A EXAMPLE OF THE DEFAULT Pi-Star DASHBOARD YOURS MAY DIFFER!!
Main Pi-Star Dash Board
On the left is the basic dashboard after you put in all you information in the configuration page. In the Modes Selected section,
DMR is in GREEN meaning that DMR is up and running. If it was RED that would mean there is something wrong (with the settings in the configuration or even Internet connection or the Pi is in
reset mode).

In the Network Status section, DMR Net is GREEN indicates that every thing is up and running. If it was a YELLOW color that
usually means something is wrong with the network.

In the Radio Info section:
  1. Trx indicates if the Pi-Star is transmitting to or receiving from the radio
  2. TX & RX is the frequency. (If you are using SIMPLEX these will be the same. If you are using DUPLEX you will have one for TX and one for RX).
  3. DMR ID -- This is YOUR DMR ID you entered in configuration.
    • Usually TS1 will be disabled and TS2 will be enabled. This is only enabled this way if you are using a simplex hotspot, if using a duplex hotspot TS1 and TS2 will be enabled since you will operating with two frequencies.
  4. DMR CC is YOUR DMR CC for your radio.
  5. DMR Master will show ALL DMR master(s) YOU are connected to.
Any other networks that you are connected to will be
displayed under the DMR Master window.

Just remember, if ALL your boxes on your dashboard are GREEN, then you are good. If it is RED then that means it is either off line at the moment or you are having network issues.
If it is is a YELLOW the BrandMeister password is not correct. Make sure your hotspot and BrandMeister security password are correct / matches.


United States Call Sign Look Up  New Hampshire Call Sign Look Up  My QRZ Page
My QRZCQ Page My HamCall Page  Back To Start Page

HOME ABOUT CONTACT WEATHER
RADIO PROGRAMMING APRS SET UP PI-STAR SETUP HAM TOOLS
DOWNLOADS LEARN HAM RADIO
KC5DJR'S DMR HELP AND SUPPORT PAGE