UA3DJY and a group
created on the basis of WSJT ,their vision for the JT65
which turned out to be very successful, after the advent
of the FT8, they also went through it very successfully,
unfortunately for now there is no version for the FT4
.FT8 decoder more than 40-60 radio stations per session
with a regular antenna, which is unattainable from the
original, and has many additional features ,
unfortunately no contest function , but the advantages
over other FT8 programs are undeniable.
The installation of the
JTDX is identical to the WSJT.
Note the following before
you begin the installation -DO NOT INSTALL IN PROGRAM
FILES,
install on disk C and plug the USB cable into the
computer and the transceiver ALT-512
 |
insert V to Create
JTDX Desktop Icon
|
 |
install on disk
C .
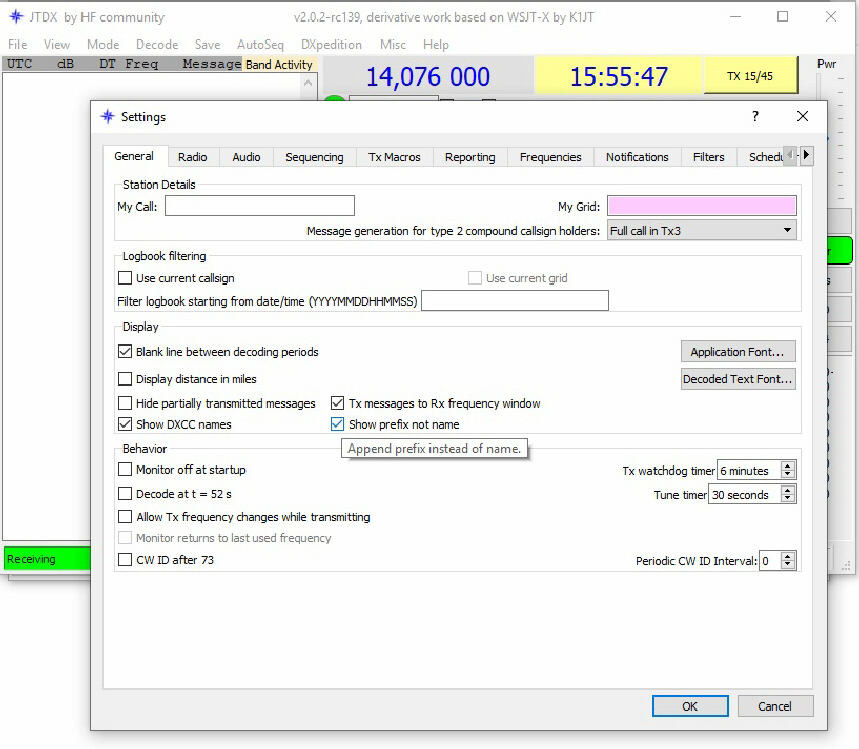
After the
installation is complete and the JTDX starts,
open Settubgs... in
directory File
|
|